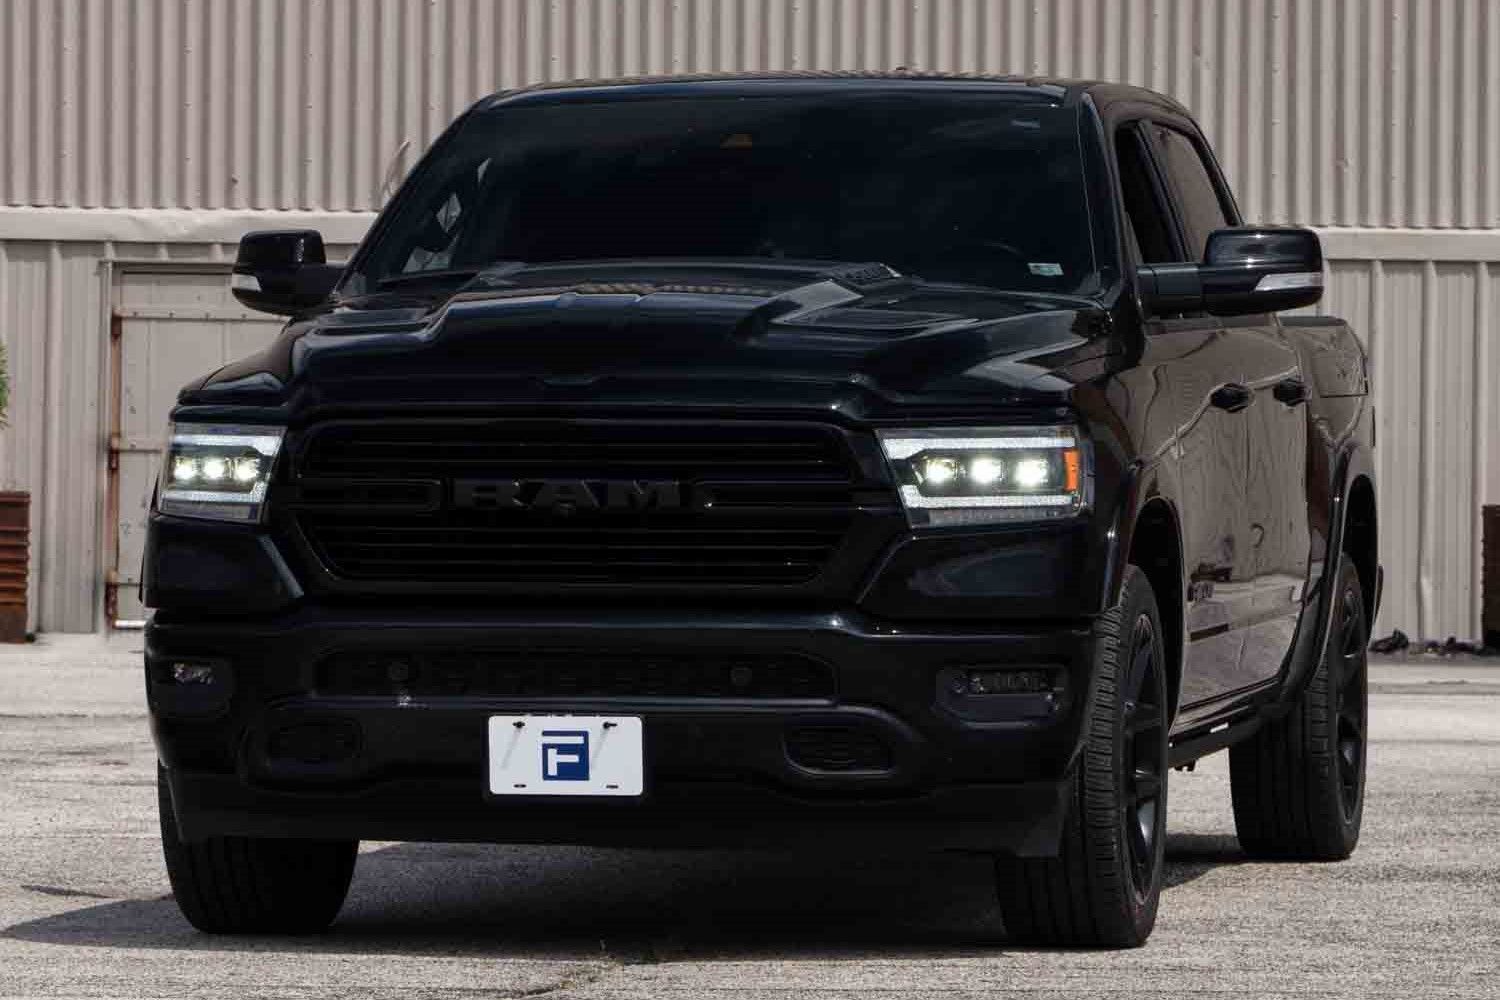
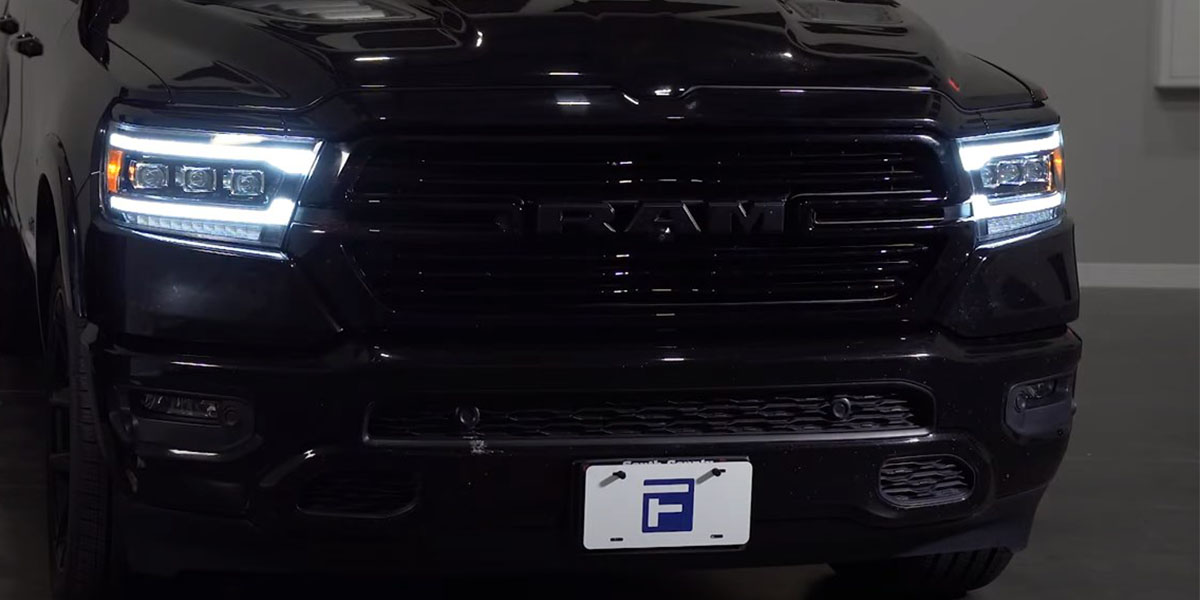
Form Lighting's Sequential LED Headlights are the perfect upgrade for the 2019-2023 Ram 1500. These OEM-grade LED headlights provide more functionality by adding triple bi-LED projectors, sequential turn signals, daytime running lights, and a start-up sequence to the Ram 1500. In addition to adding functionality, the blacked-out housing of these LED headlights enhances the Ram 1500's appearance with a modern look.
The following installation guide will provide you with detailed instructions on how to install Form Lighting's Sequential LED Headlights on the 2019-2023 Ram 1500. Check out the installation video and continue reading for step-by-step instructions below!
Table of Contents
Installation Video
Installation Tools
- Plastic Trim Removal Tool
- 8mm Shallow Socket
- 10mm Socket
- 10mm Ratcheting Wrench
- T25 Torx Driver
- T20 Torx Driver
Mounting Instructions
Step 1 - Remove Radiator Cover Clips
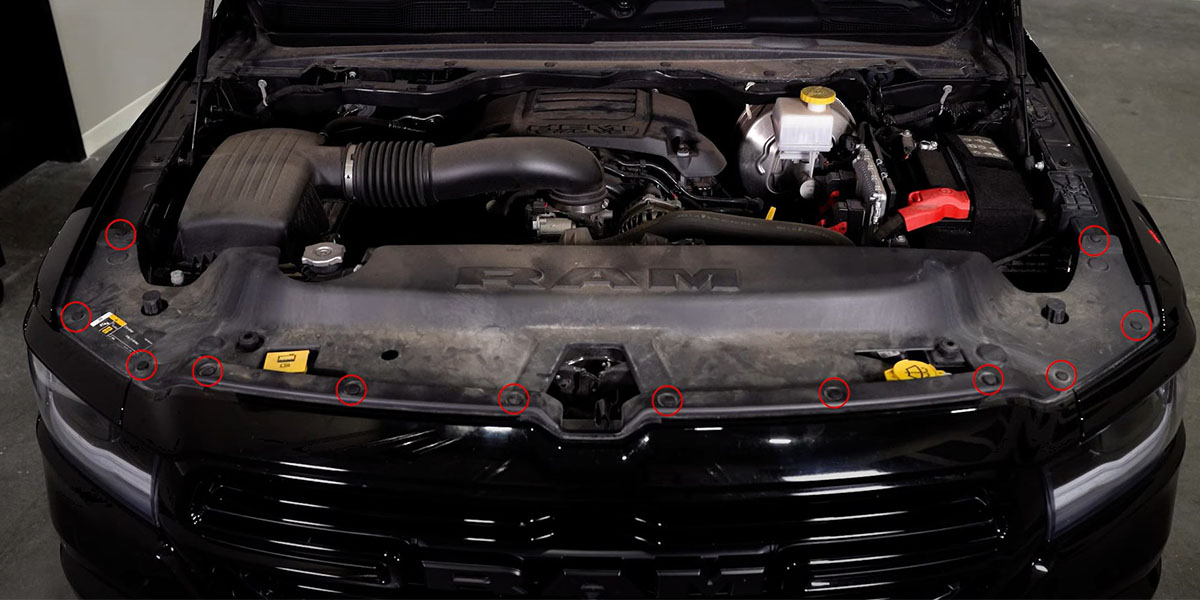
Pop the hood of the vehicle and use the plastic trim removal tool to remove the twelve (12) plastic clips (circled in red below) that hold on the radiator cover.
Step 2 - Remove Radiator Cover
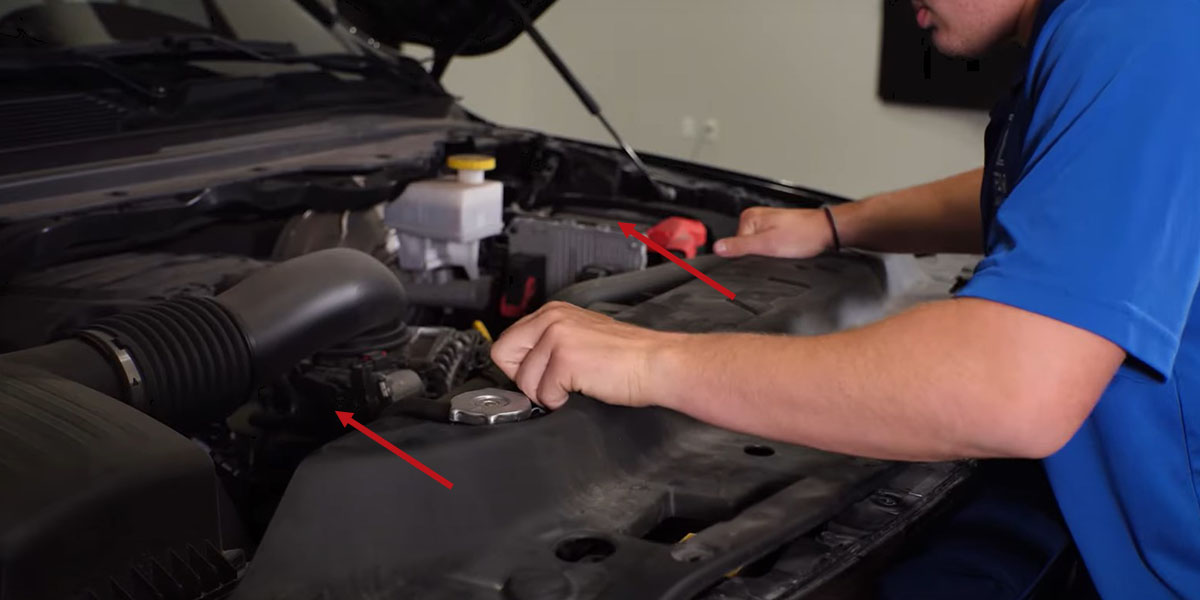
Begin removing the radiator cover by pulling each end out from under the top of the fenders as shown below.
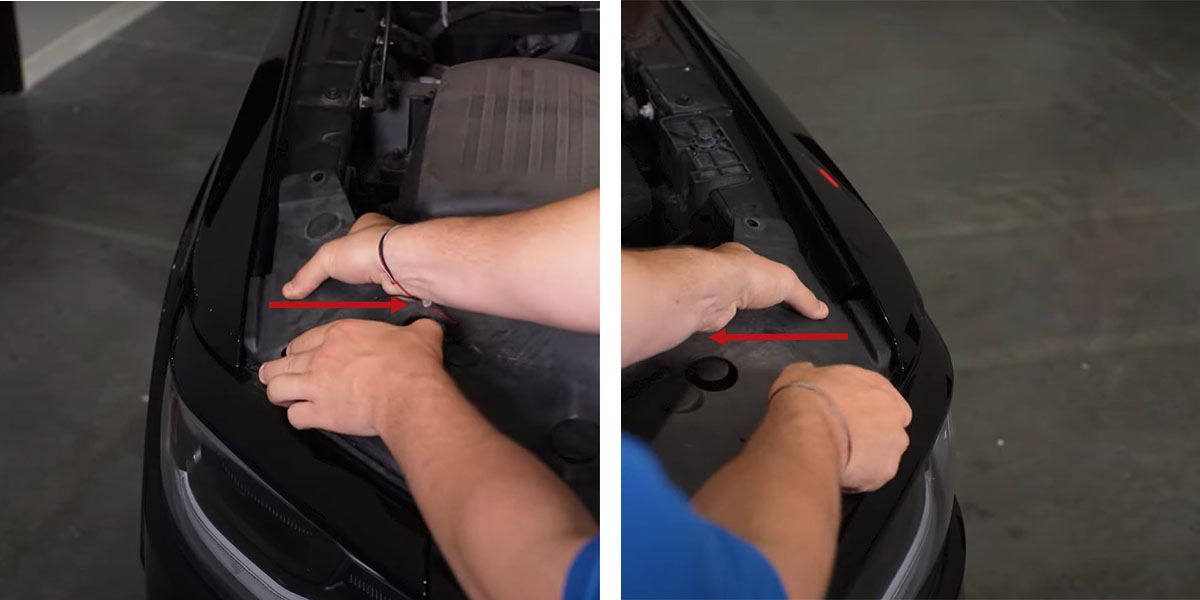
Then slide the radiator cover toward the cab of the vehicle and pull it away. Set the radiator cover aside once it is removed.
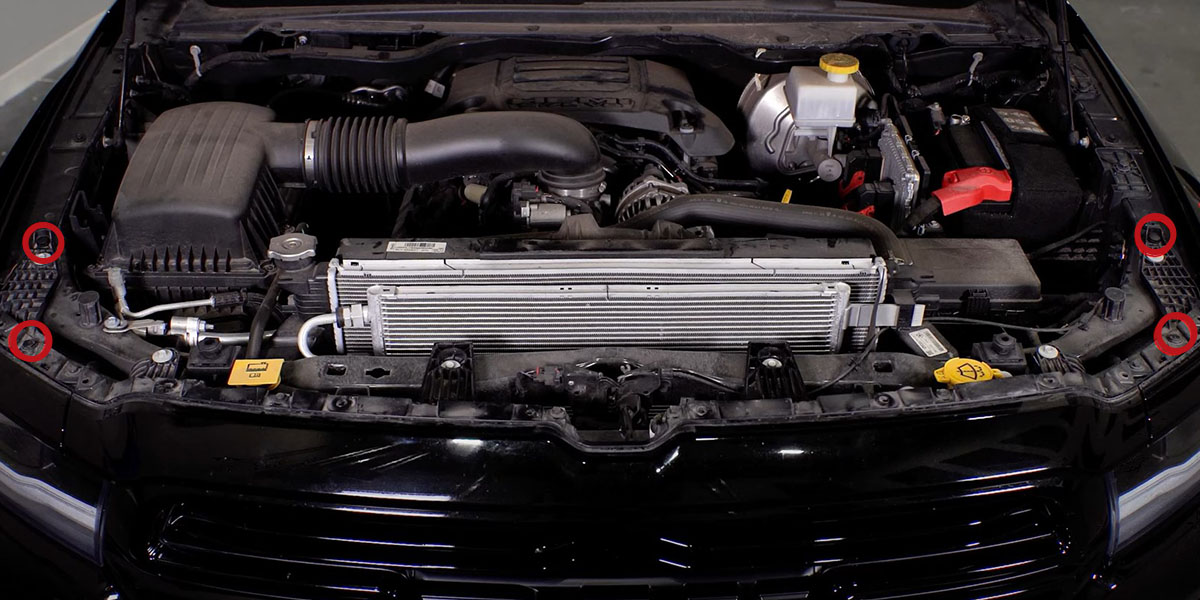
Step 3 - Remove Plastic Clips
Use the plastic trim removal tool to remove the four plastic clips circled in red below.
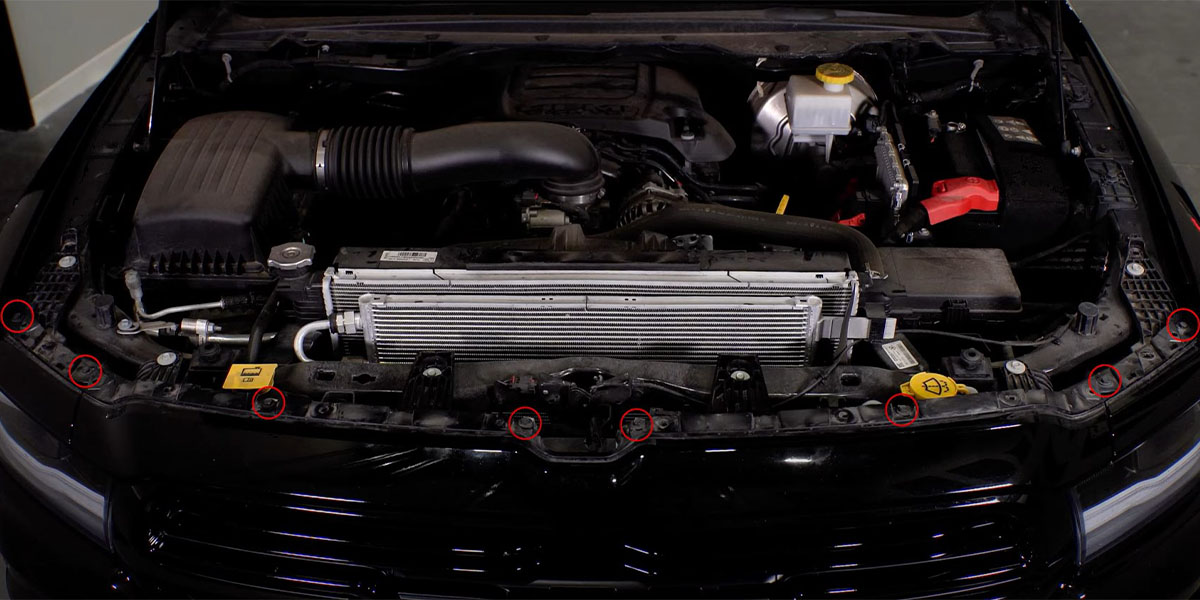
Step 4 - Remove Top Grille Bolts
Use a 10mm socket to remove the eight bolts (circled in red below) from along the top of the grille.
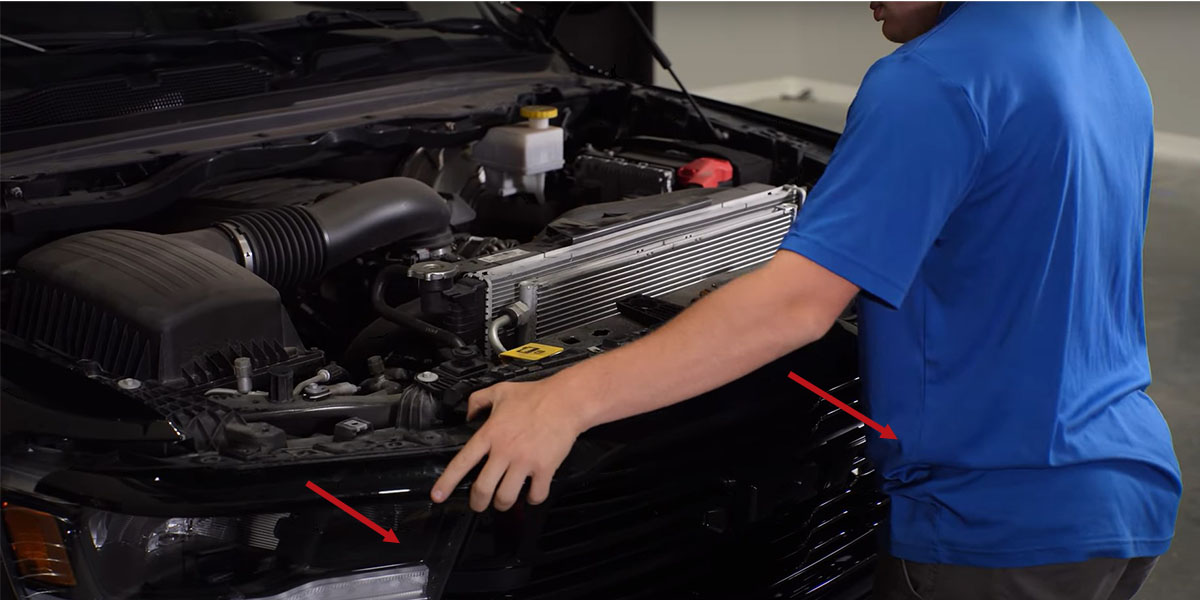
Step 5 - Remove Top Trim Piece
With the top trim piece now free, slide it away from the vehicle and set it aside.
Step 6 - Remove Inner Fender Bolts
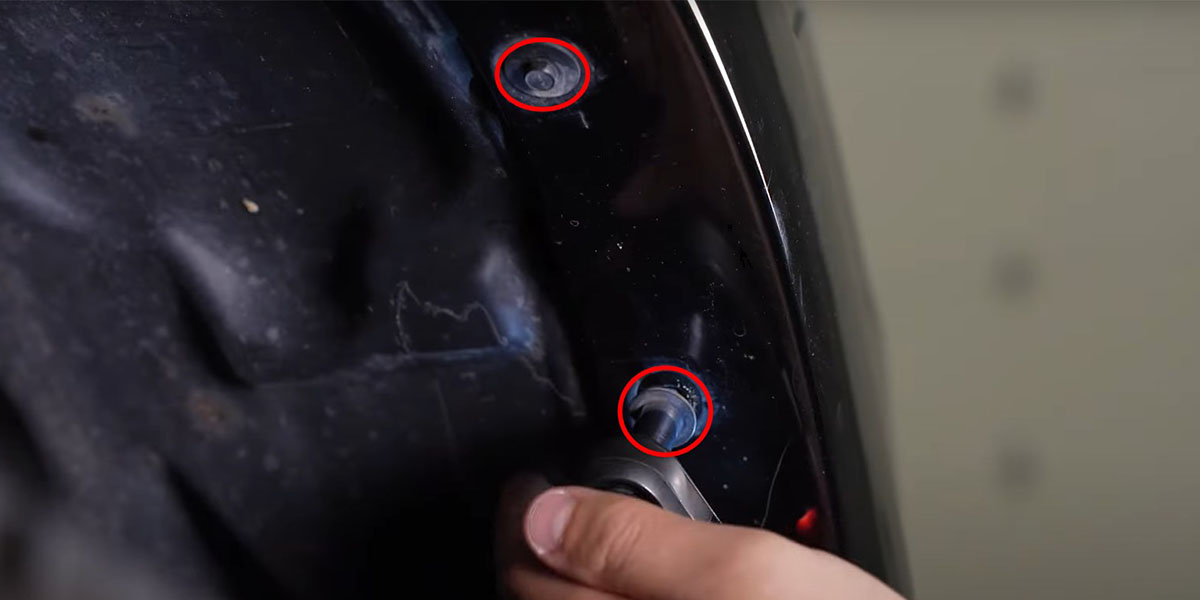
On the passenger side of the vehicle, use an 8mm socket to remove the four bolts (circled in red) along the front of the inner fender.
Note: If your Ram 1500 has a fender flare, you'll need to remove all ten 8mm bolts.
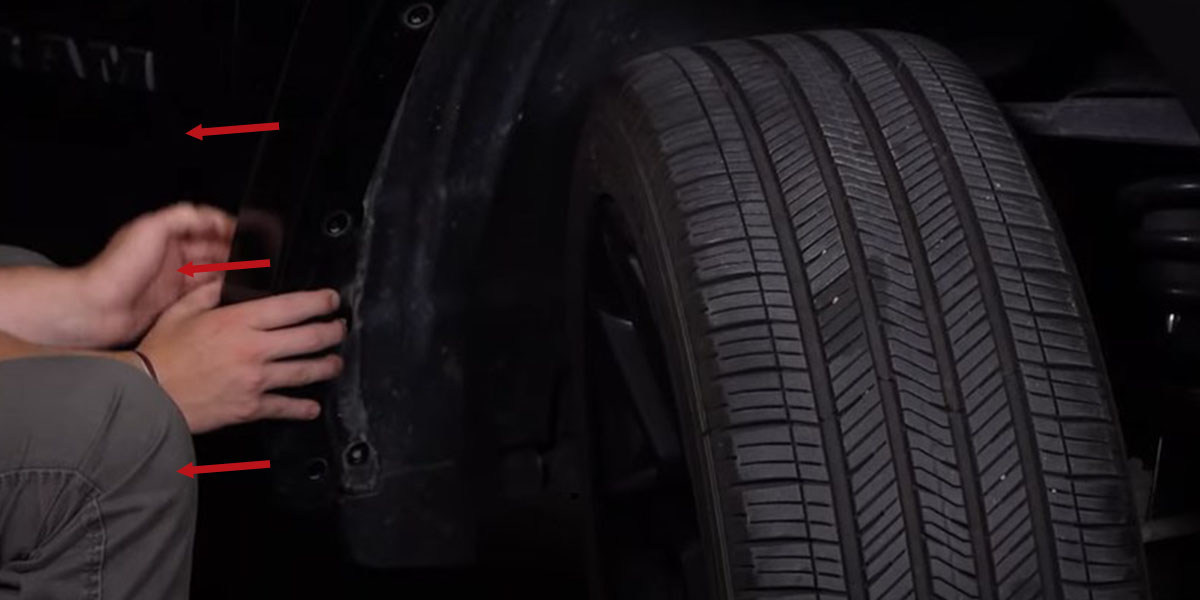
Step 7 - Remove Fender Flare
Pull the fender flare trim piece free of the vehicle by working from one end to the other. Be careful not to break any plastic clips. If you can, pinch the clips from the opposite side as you pull away.
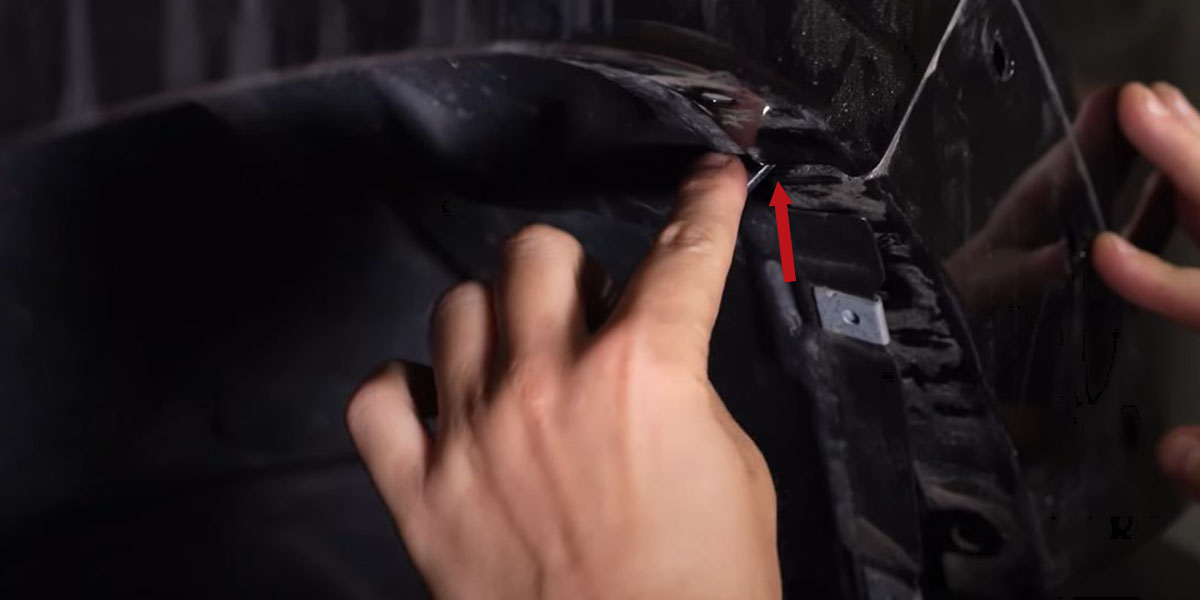
Step 8 - Remove Corner Bumper Bolt
Use a 10mm wrench to remove the 10mm bolt that is holding the corner bumper panel onto the fender. The bolt can be accessed through the gap between the corner bumper panel and the fender as indicated by the red arrow below.
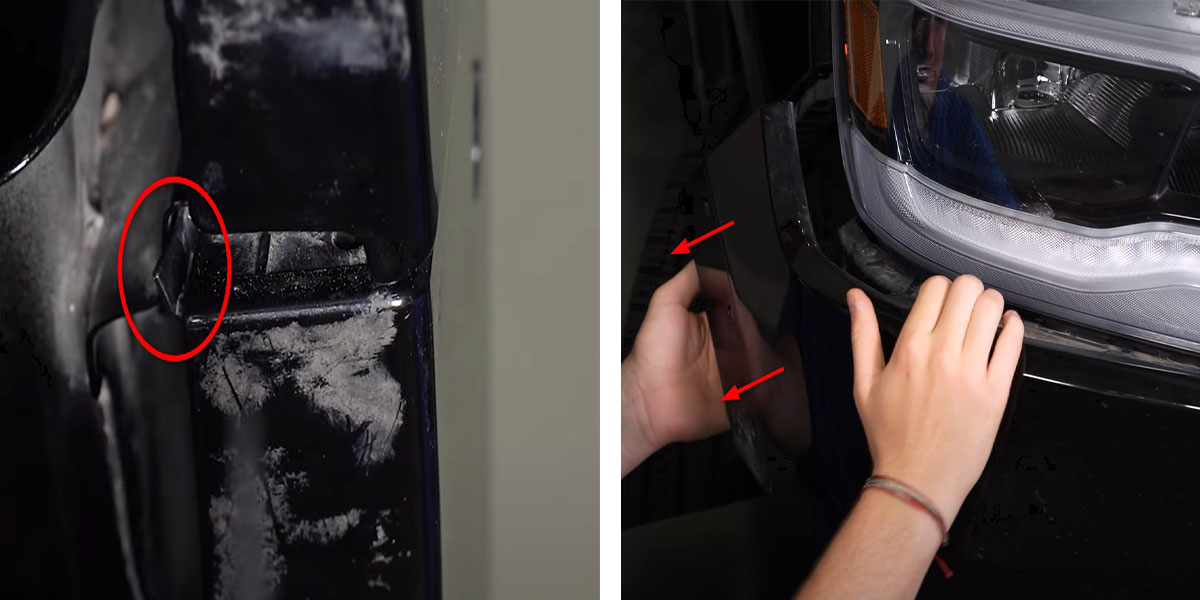
Step 9 - Pull Away Corner Panel
There is a small fastener locking tab (circled in red below) where the fender meets the bumper panel. Release the tab by sliding a plastic trim removal tool along the lip and pulling it down. You'll feel and hear the clip release, allowing you to pull the corner panel away from the vehicle.
Continue removing the tabs along the corner panel, but stop where the panel meets and attaches to the grille. Then repeat Steps 6-9 on the driver's side of the vehicle.
Step 10 - Remove Lower Headlight Bolts
On both the passenger and driver's side, use a 10mm wrench and socket to remove three lower headlight bolts (circled in red) located behind the corner panel.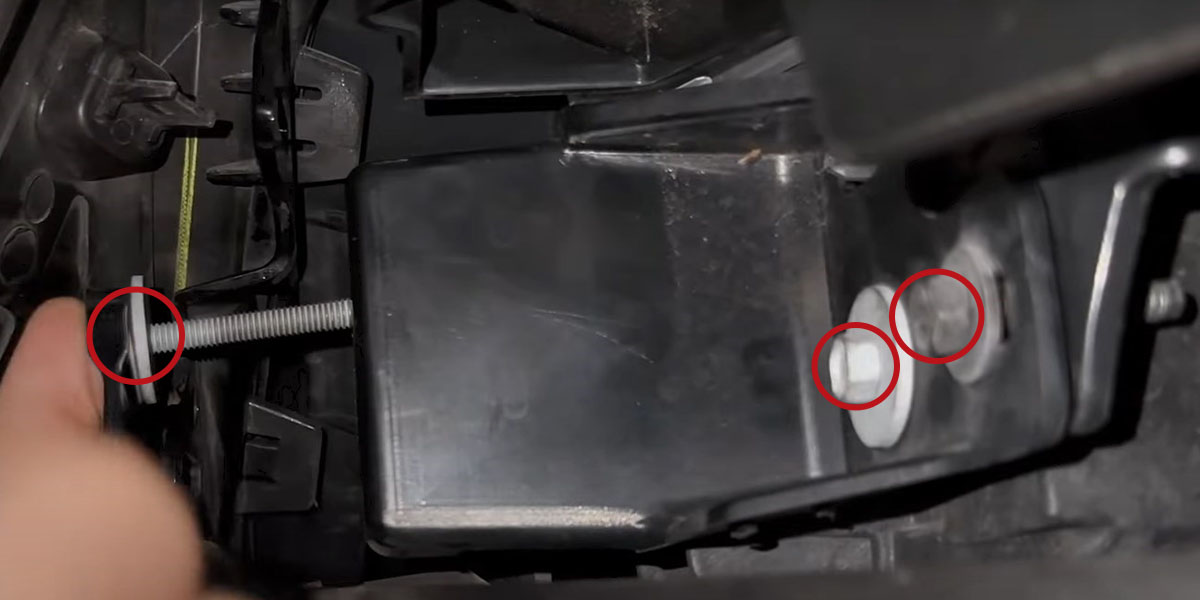
Step 11 - Remove Grille Bolts
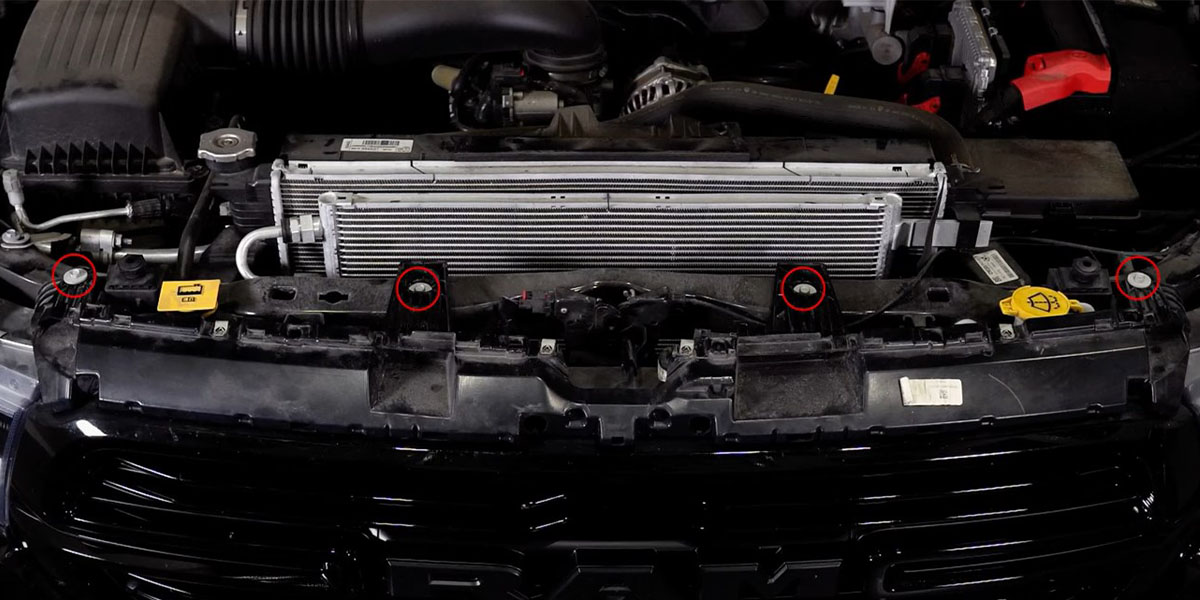
Coming back to the top of the engine bay, use a 10mm socket to remove the four (4) 10mm bolts along the top of the grille (circled in red below).
Step 12 - Disconnect Front Camera
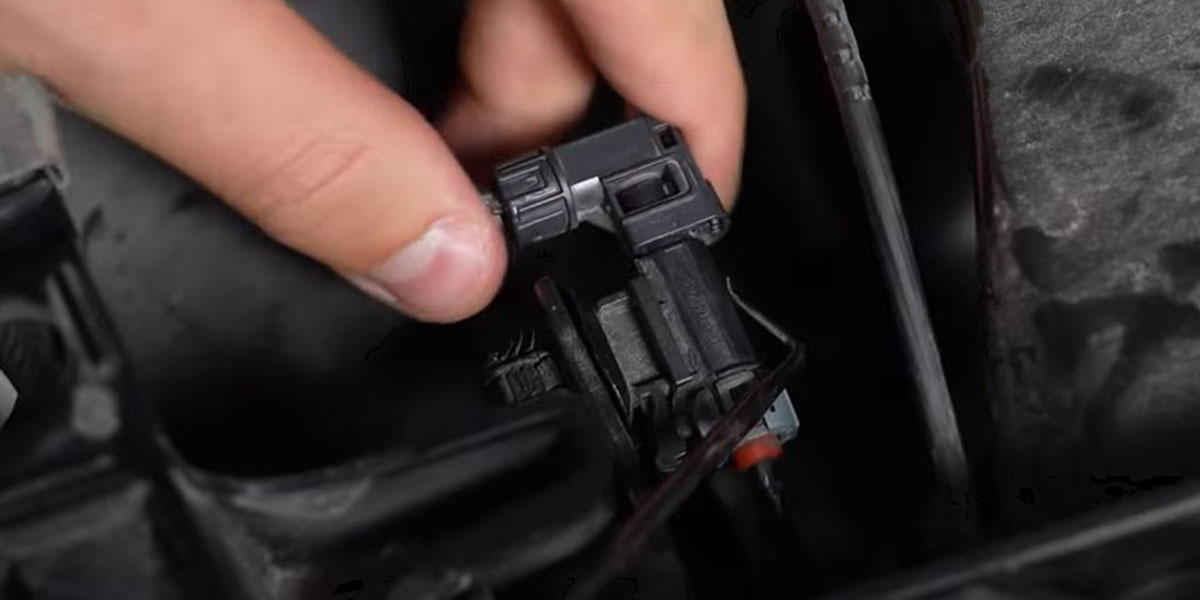
If your truck is equipped with a front camera, you'll need to locate it next to the hood release. Then use a pick tool to disconnect the camera.
Step 13 - Pull Grille Away
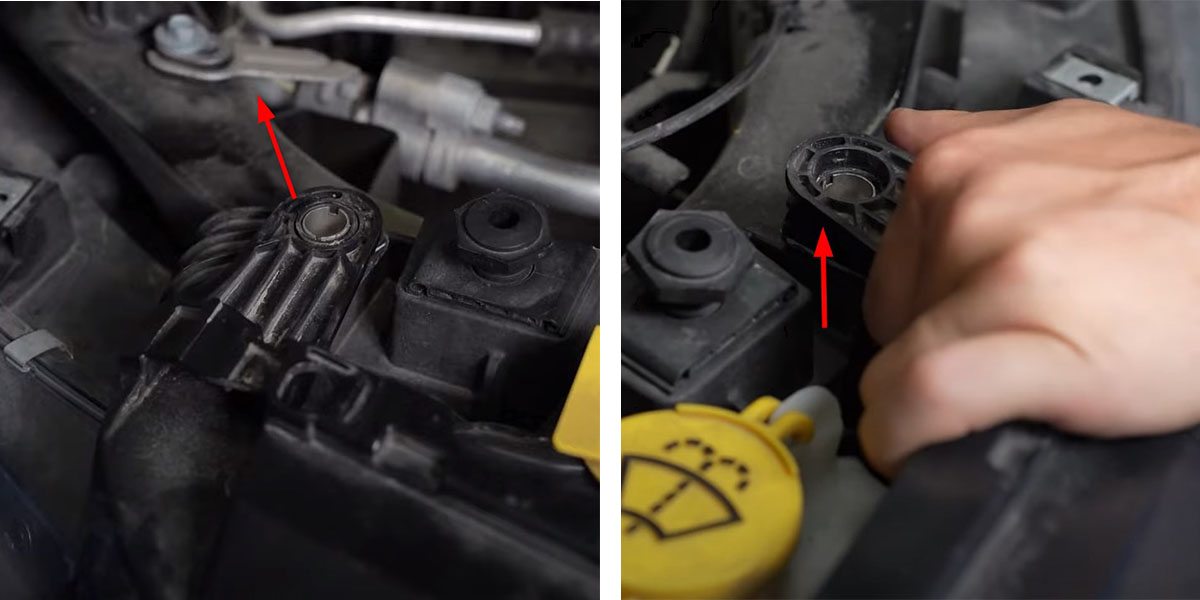
Lift up on the tabs of the grille near each headlight before pulling the grille away from the vehicle. Once free, set the grille aside.
Step 14 - Remove Factory Headlight
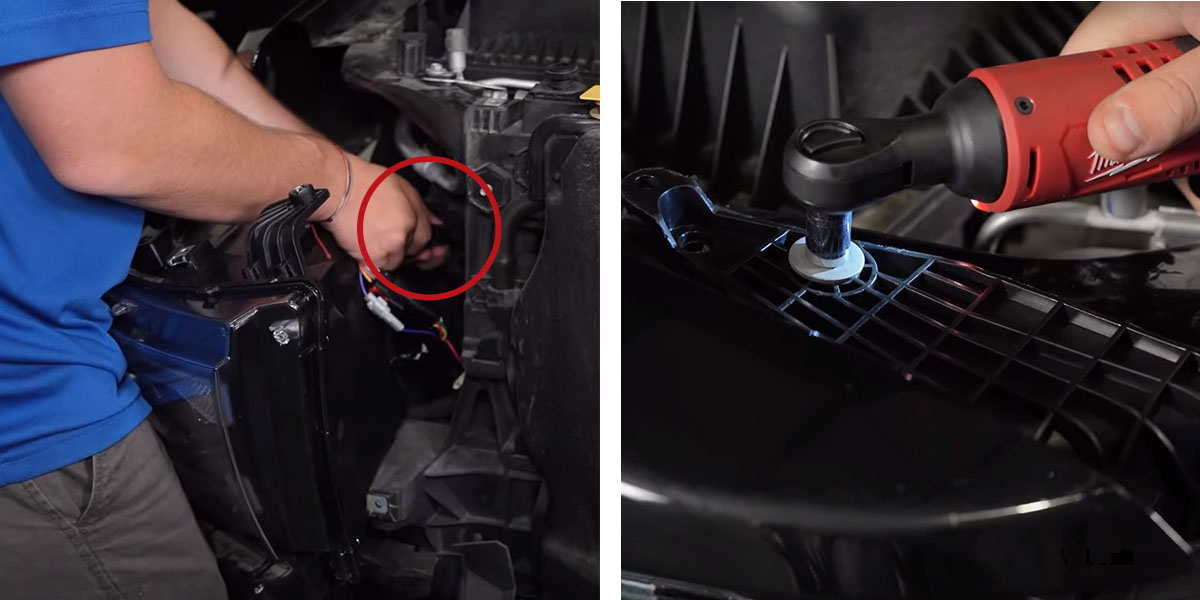
Beginning on the passenger side, use a 10mm socket to remove two bolts (circled in red below) located on the side and top of the headlight. Make sure to keep your hand on the factory headlight as the bolts are removed.

Then pull the headlight away from the vehicle and disconnect the factory wiring harness (circled in red below).
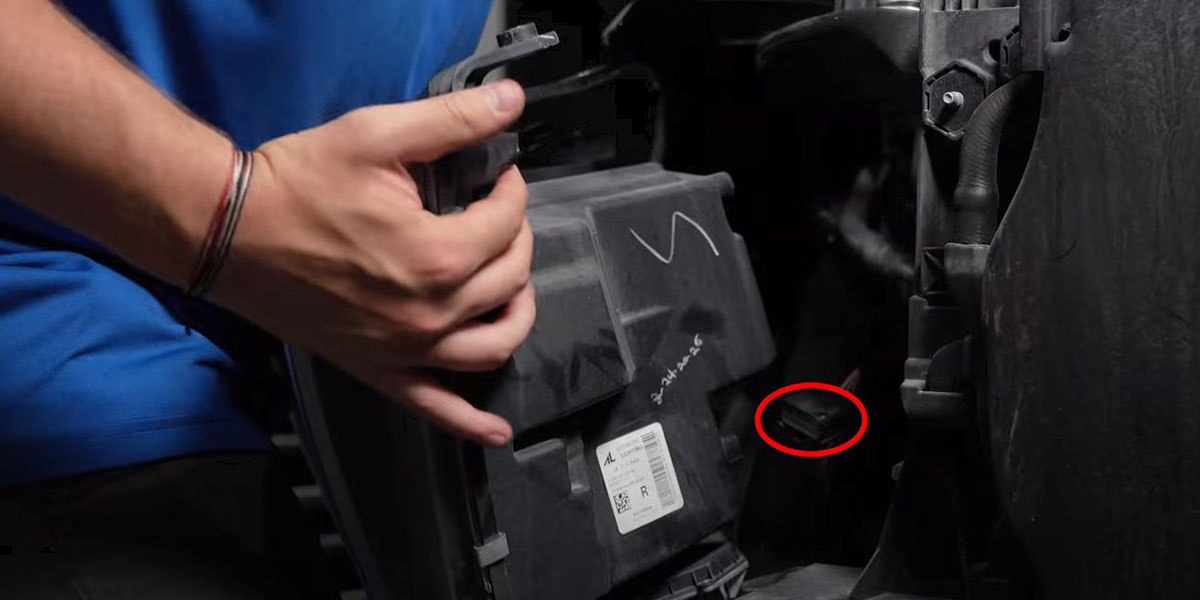
Repeat this step to remove the driver's side factory headlight.
Step 15 - Transfer Factory Mounting Brackets
On the bottom of each removed factory headlight are mounting brackets that need to be transferred to the new Form Sequential LED Headlights before they can be installed.
Use a T25 Torx bit to remove the five screws (circled in red below) from along the bottom of each factory headlight.
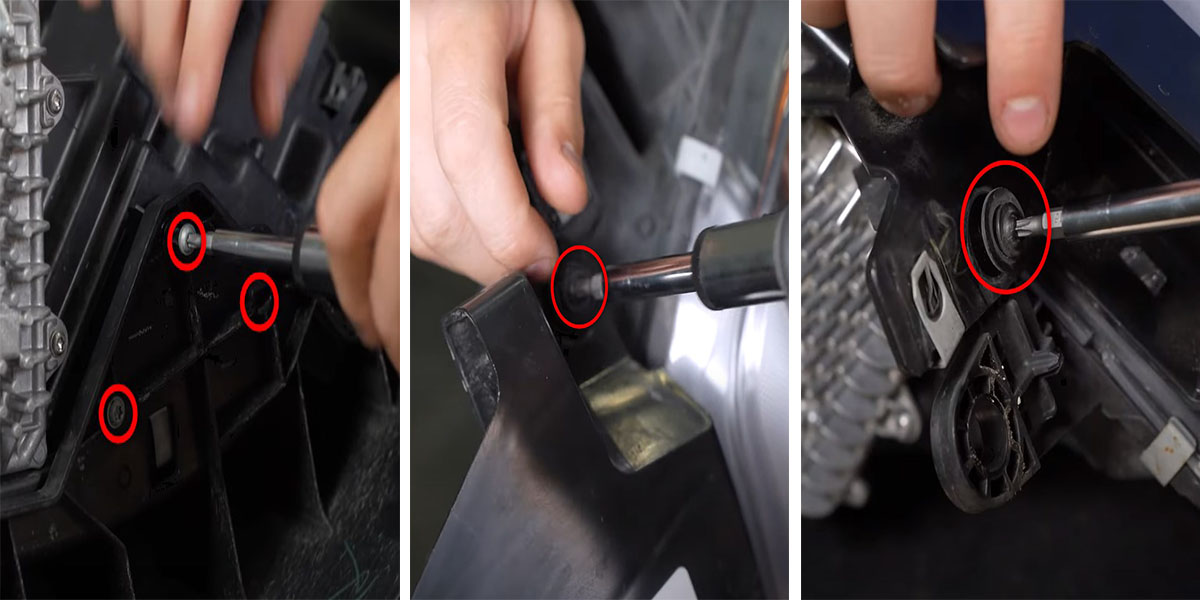
Then transfer the mounting brackets onto the bottom of your new Form Sequential LED Headlights and fasten them using the five factory T25 Torx screws you've just removed.
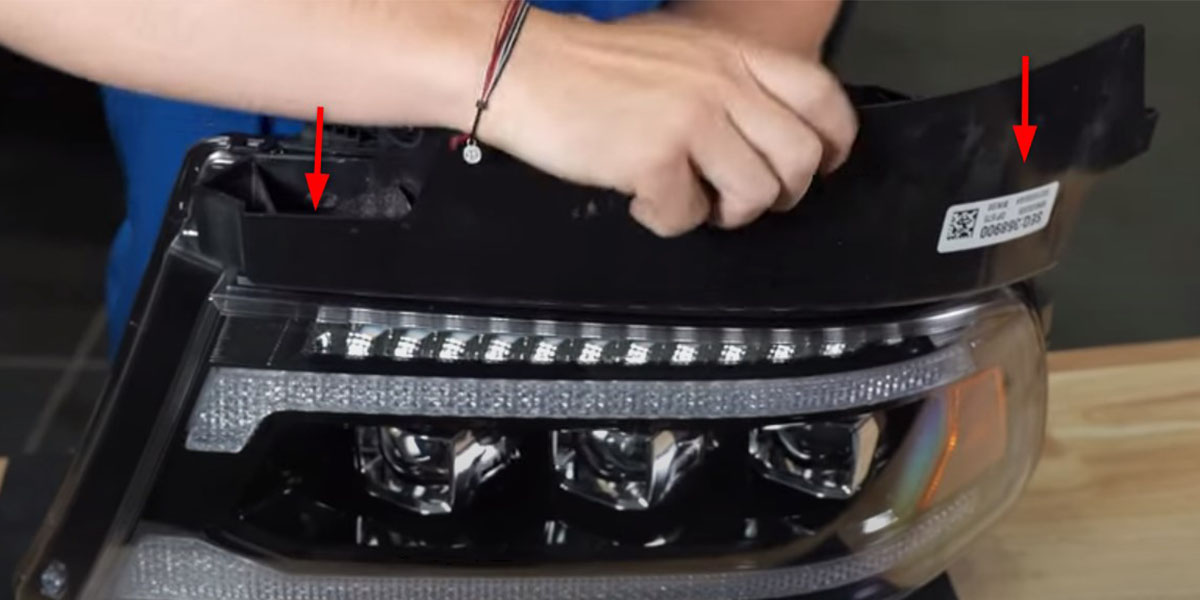
Step 16 - Plug In Adapter
If your Ram 1500 has factory LED headlights:
Plug the 12-pin connector of the adapter (circled in red below) into your new Form Sequential LED headlights and plug the purple wire connector into the connector circled in blue below. Then plug the free end of the adapter into the factory wiring harness.
Note: The remaining red amp connector on the back of the Form Sequential LED Headlight will not be used and may hang freely.
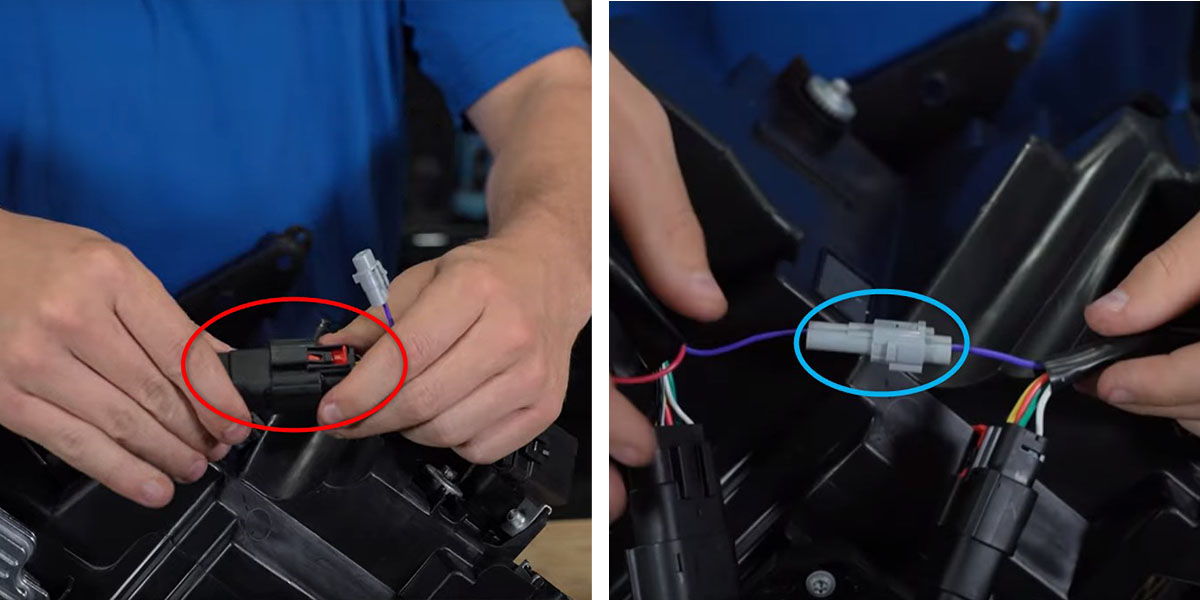
If your Ram 1500 has factory halogen headlights:
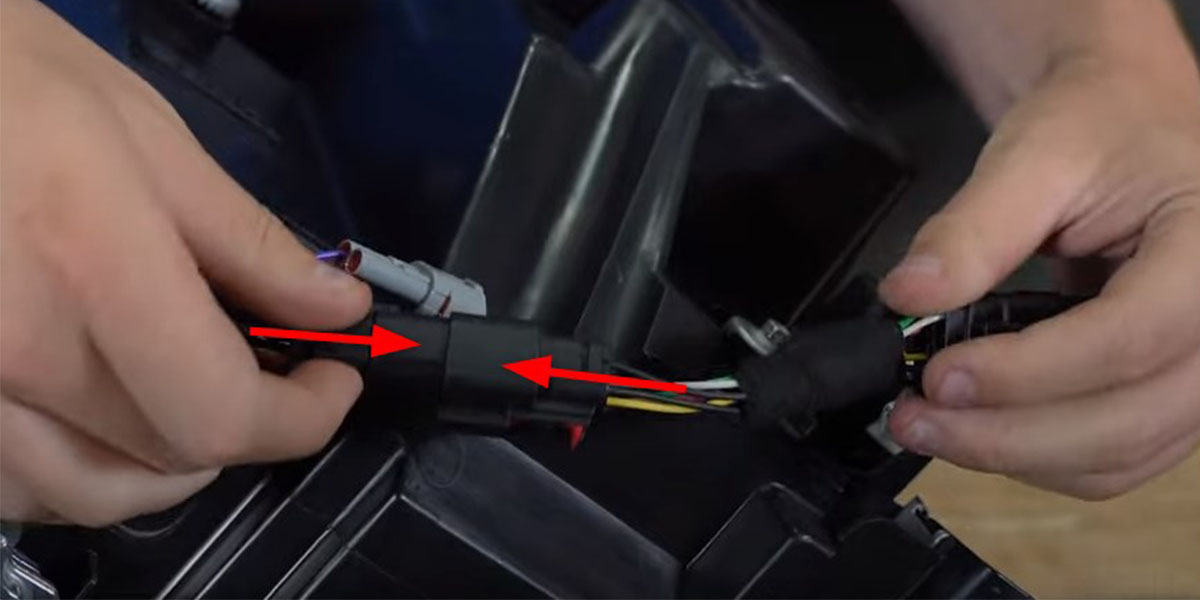
Plug the 12-pin connector of the adapter into your new Form Sequential LED Headlights as shown below. Then plug the free end of the adapter into the factory wiring harness.
Note: The red amp connector on the back of the Form Sequential LED Headlight will be connected in Step 17. The remaining purple wire connector will not be used and may hang freely.
Step 17 - Install DRL Harness
Note: If you're upgrading from factory LED headlights, you may skip this step. If you're upgrading from factory halogen headlights, you'll need to install the DRL harness.
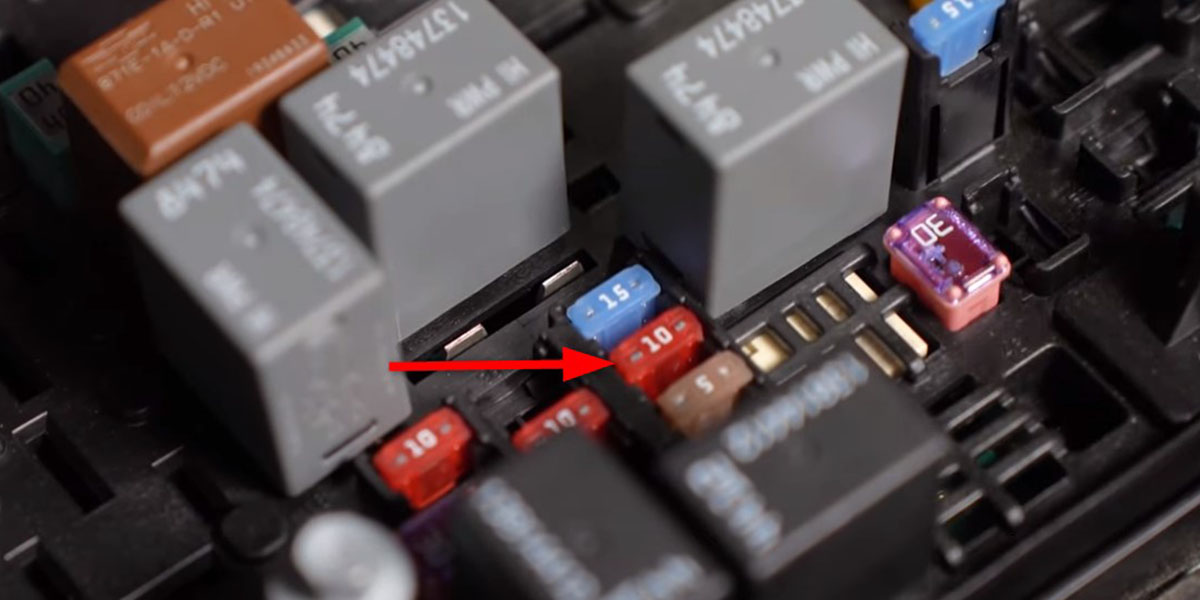
Start by opening your fuse box and locating the 10 AMP F38 fuse (indicated by the red arrow below). Use a fuse-pulling tool or needle nose pliers to remove the 10 AMP fuse.
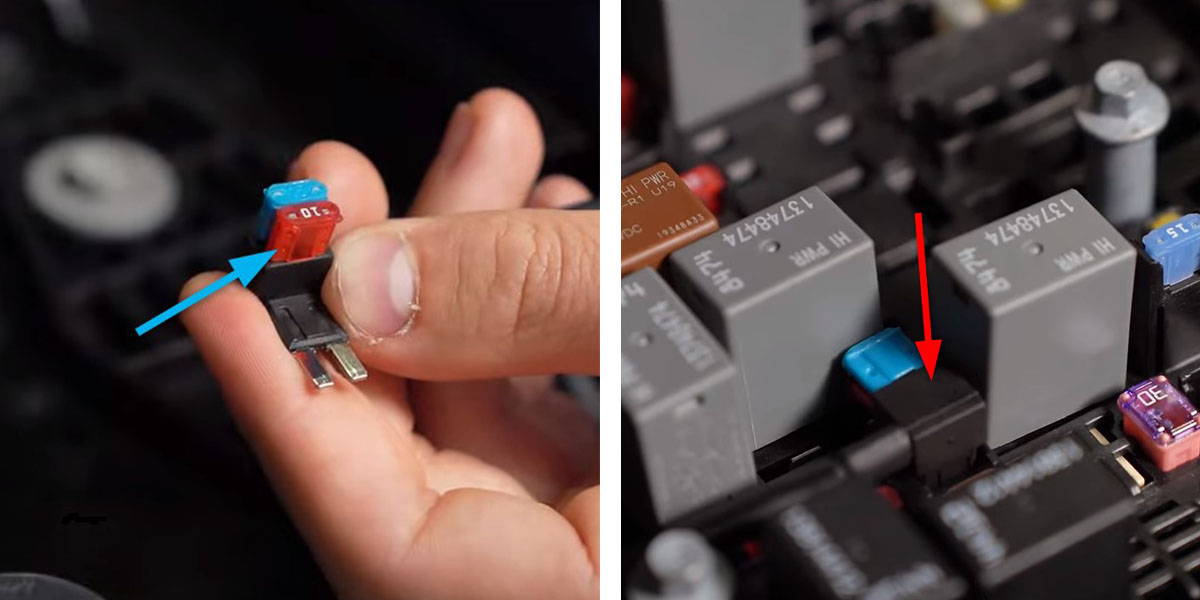
Then place the removed 10 AMP fuse into the bottommost slot of the included add-a-fuse harness (indicated by the blue arrow below) before plugging the new adapter back into the F38 fuse slot (indicated by the red arrow below) and closing the box.
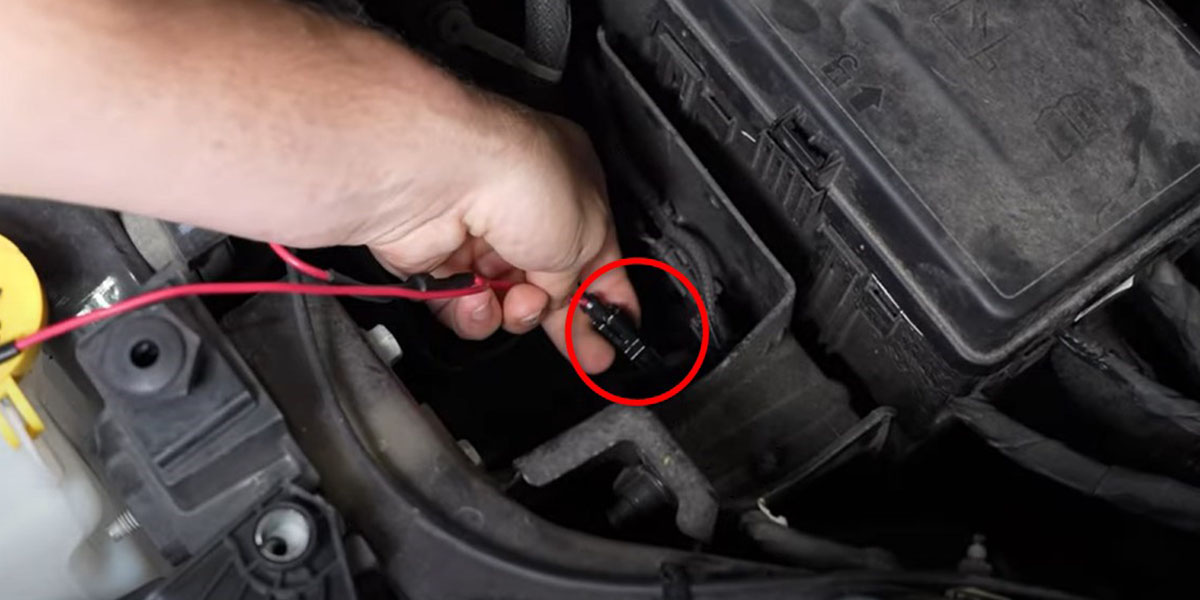
Plug the DRL harness into the add-a-fuse adapter harness (circled in red below) outside of the fuse box. Route one of the two AMP connectors of the DRL harness towards the driver-side headlight. Then route the remaining AMP connector to the passenger-side headlight following along the radiator core support.
Step 18 - Install Form Sequential LED Headlights
With the appropriate adapters plugged in, connect the passenger side Form Sequential LED Headlight to the factory wiring harness disconnected in Step 14.
If your Ram had factory halogen headlights, plug the two AMP connectors of the DRL harness that you routed in Step 17 into the red lead receptacles (indicated by the red arrow below) on the back of the Form Sequential LED Headlights.
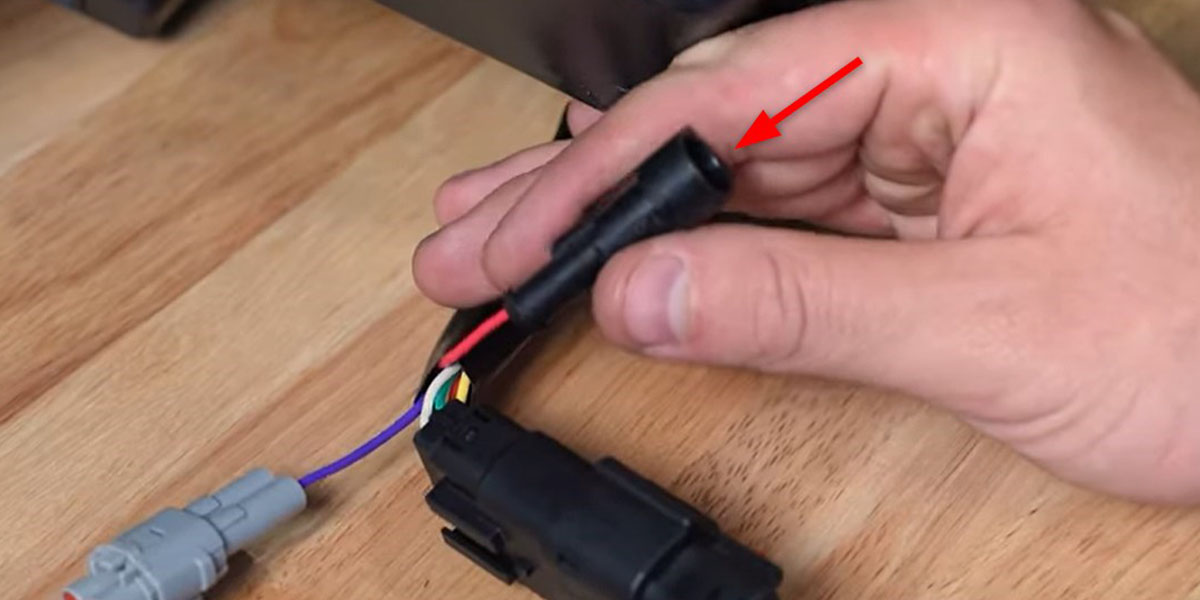
Then bolt the headlights in place using the factory 10mm bolts previously removed in Step 14.
Repeat this step on the Driver's side to install the remaining Form Sequential LED Headlight.
Step 19 - Reassemble Your Ram 1500
Reassemble your Ram 1500 by reversing the steps used to take it apart. Zip-tie any loose wiring away from hot or moving parts.
Step 20 - Make Aiming Adjustments
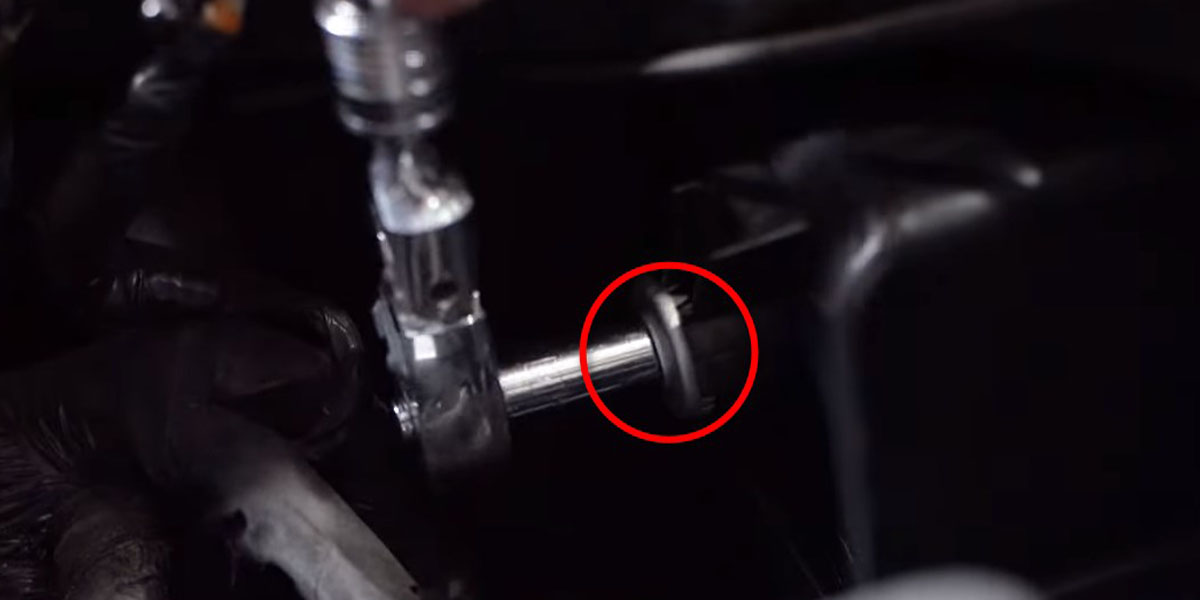
Use an 8mm socket to make your aiming adjustments.
To aim the lights up or down, you will either tighten or loosen the adjustment screw (circled in red below) located at the top of your new Form Sequential LED headlights.
For a more detail description refer to our headlight aiming blog - How To: Aim Your Headlights.
This completes the installation. Enjoy your new Form Lighting Ram 1500 Sequential LED Headlights!
Questions About the Installation?
If you have any questions or issues installing Form Lighting's Sequential LED Headlights for the 2019-2023 Ram 1500, please contact us for further assistance.
Where Can I Buy Form Lighting 2019-2023 Ram 1500 Sequential LED Headlights?
If you’re ready to upgrade your 2019-2023 Ram 1500 with Form Lighting Sequential LED Headlights, you can purchase them by clicking here, or use our dealer locator to find a dealer near you.
Want to know more about Form Lighting products? Visit formlights.com and subscribe to our newsletter for new product releases and more!
This Installation Guide is for the following SKU: FL0015

