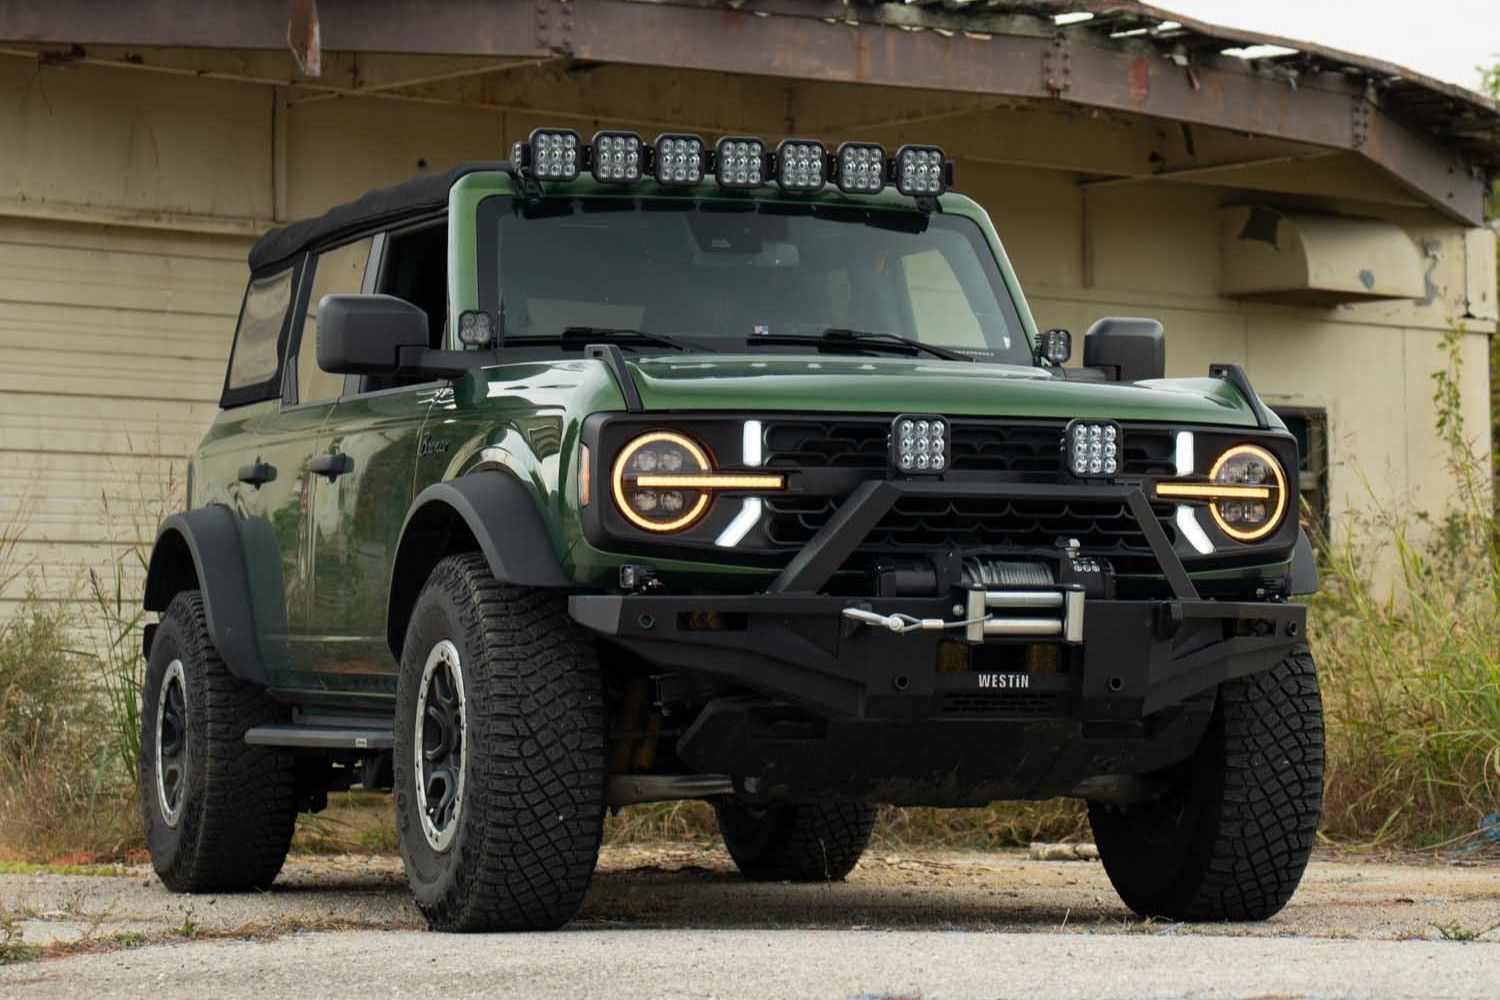
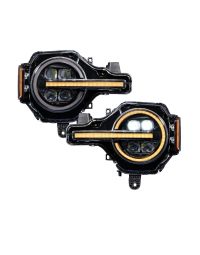
Form Lighting's Amber Selectable DRL LED Headlights are the perfect upgrade for the 2021-2024 Ford Bronco and Bronco Raptor. These OEM-grade LED headlights are packed with modern features including a sharp cutoff, a sequential turn signal, a unique startup sequence, and plug-and-play installation!
These LED headlights feature a selectable Amber or White DRL for an ultra-modern, high-end appearance that will make your Ford Bronco and Bronco Raptor stand out both on and off the trail!
The following installation guide will provide you with detailed instructions on how to install Form Lighting's LED headlights on the 2021-2024 Ford Bronco and Bronco Raptor. Check out the installation video and continue reading for step-by-step instructions below!
Table of Contents
Installation Video
Installation Tools
- Plastic Trim Removal Tool
- Ratchet
- Extension Socket
- 10mm Socket
- 8mm Socket
- Needle Nose Pliers
- Phillips Head Screwdriver
Installation Instructions
Step 1 - Remove Grille Clips
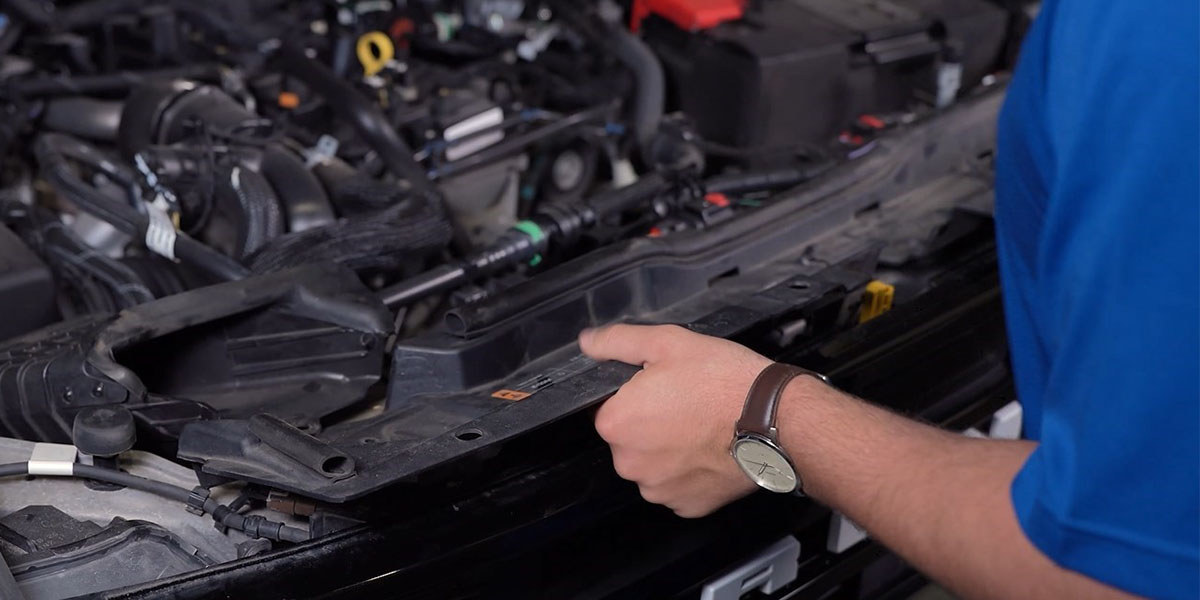
Begin the installation by opening the hood. Then, use a plastic trim removal tool to remove the nine clips (circled in red) from the top of the grille.
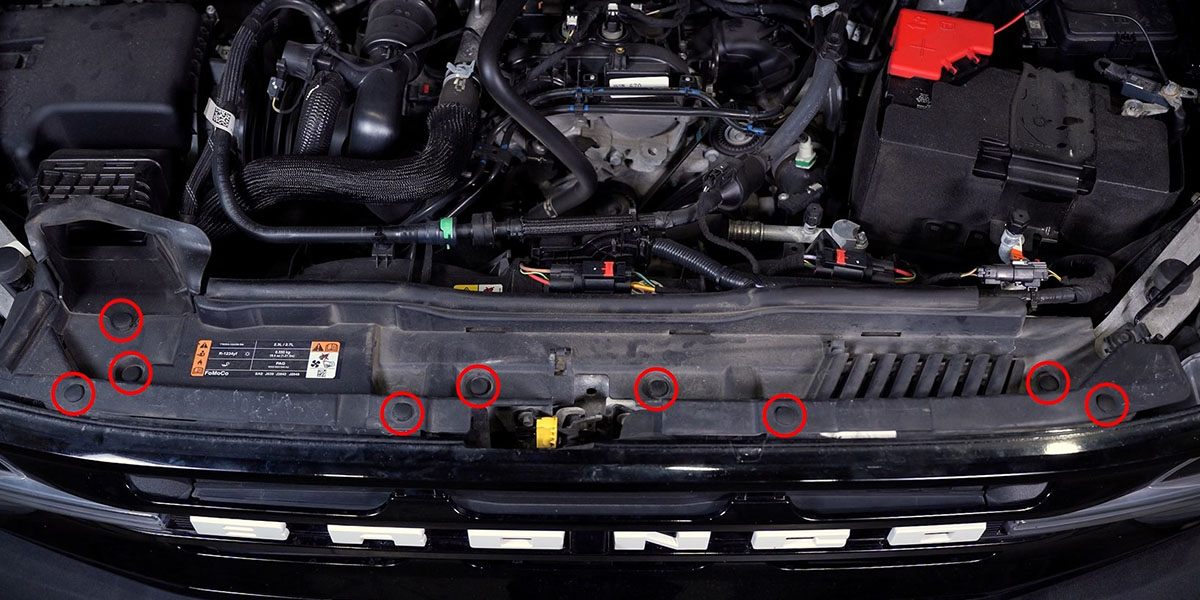
Then remove the plastic radiator cover.
Step 2 - Remove Grille Bolts
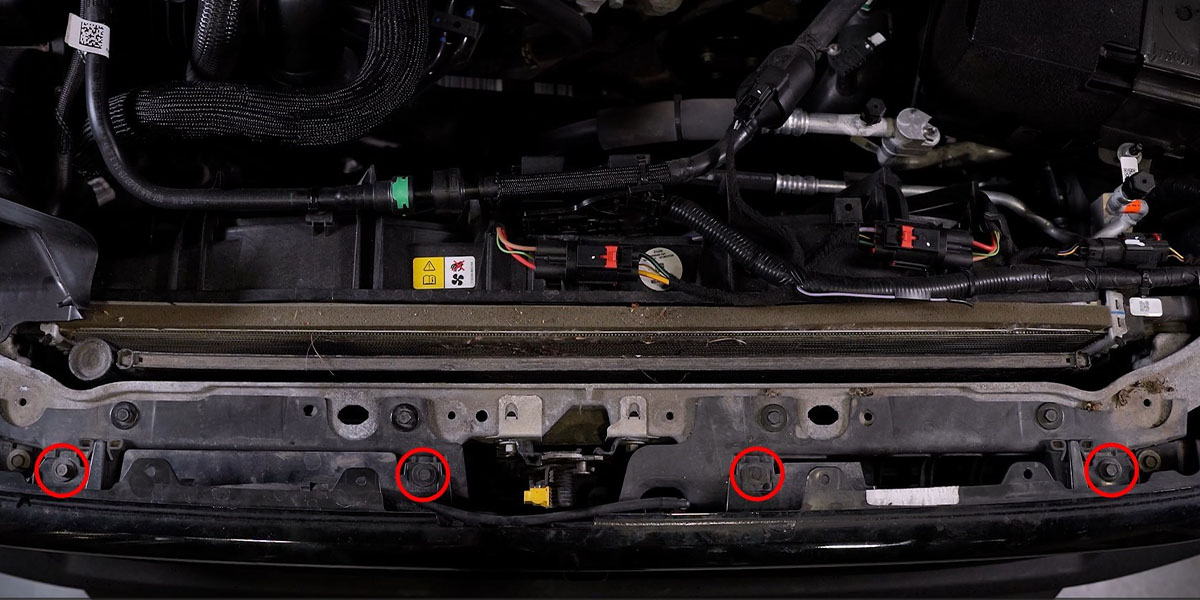
Use a 10mm socket to remove the four bolts (circled in red) from the top of the grille.
Step 3 - Disconnect Camera and Washer Fluid Connectors
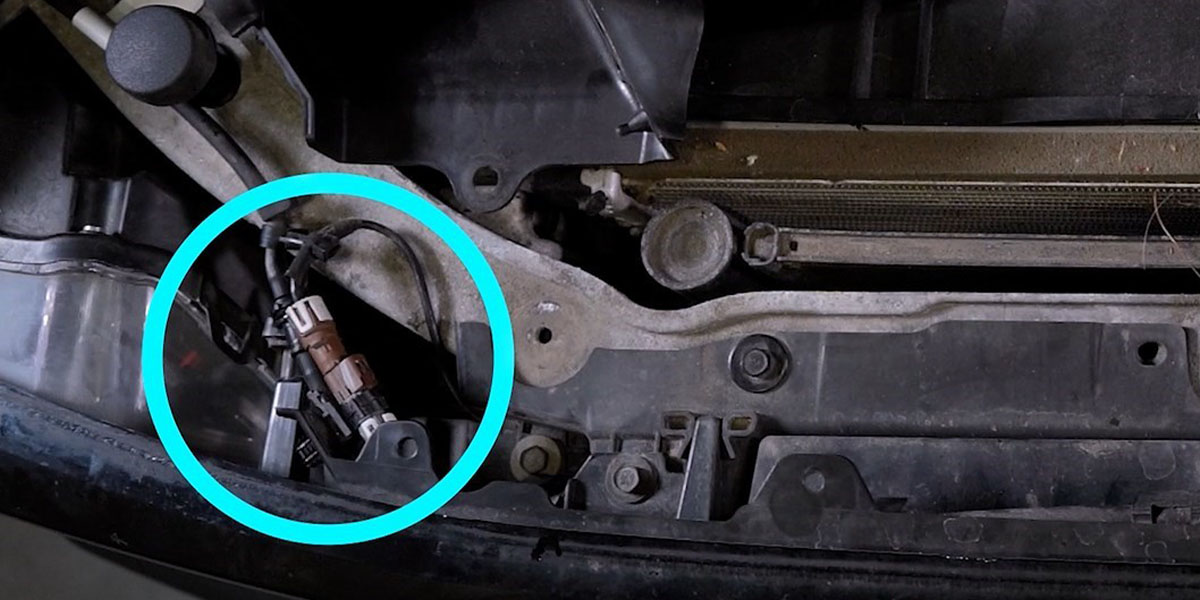
Disconnect the front camera and washer fluid connectors (circled in blue).
Step 4 - Remove Grille
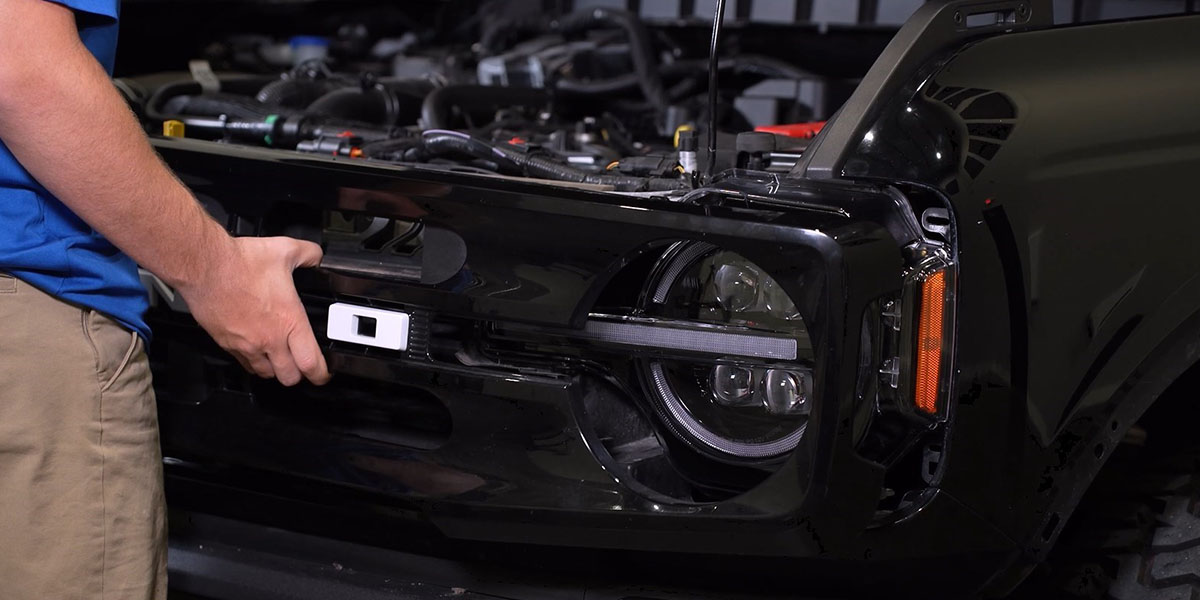
Remove the grille by pulling it away from the vehicle, working from each outer edge towards the center.
Step 5 - Remove Fender Flares
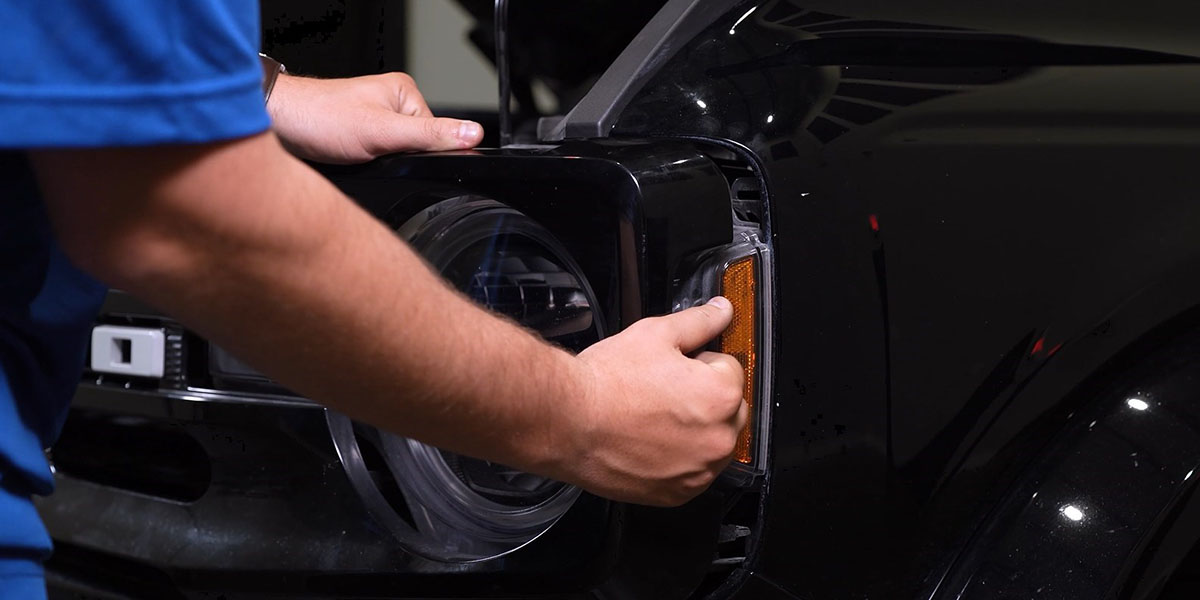
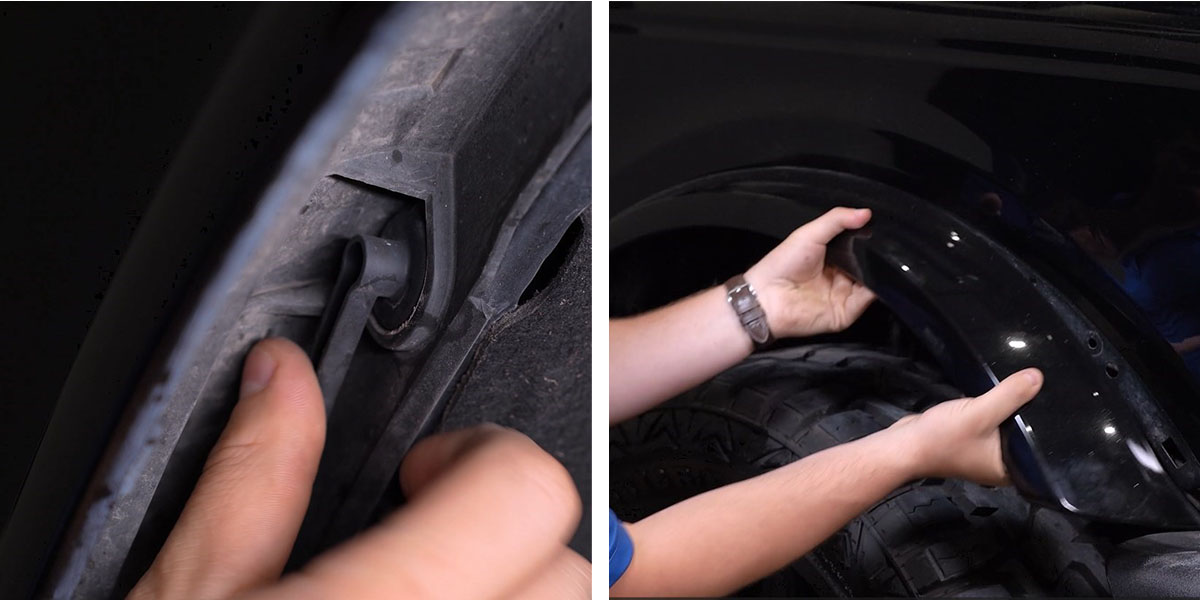
Beginning on the passenger side, rotate the five locking levers on the inside of the flare counter-clockwise to release the flare from the fender. Then pull the flare away from the vehicle. Repeat this step on the driver's side of the vehicle.
Step 6 - Pull Out Lower Grille Surround
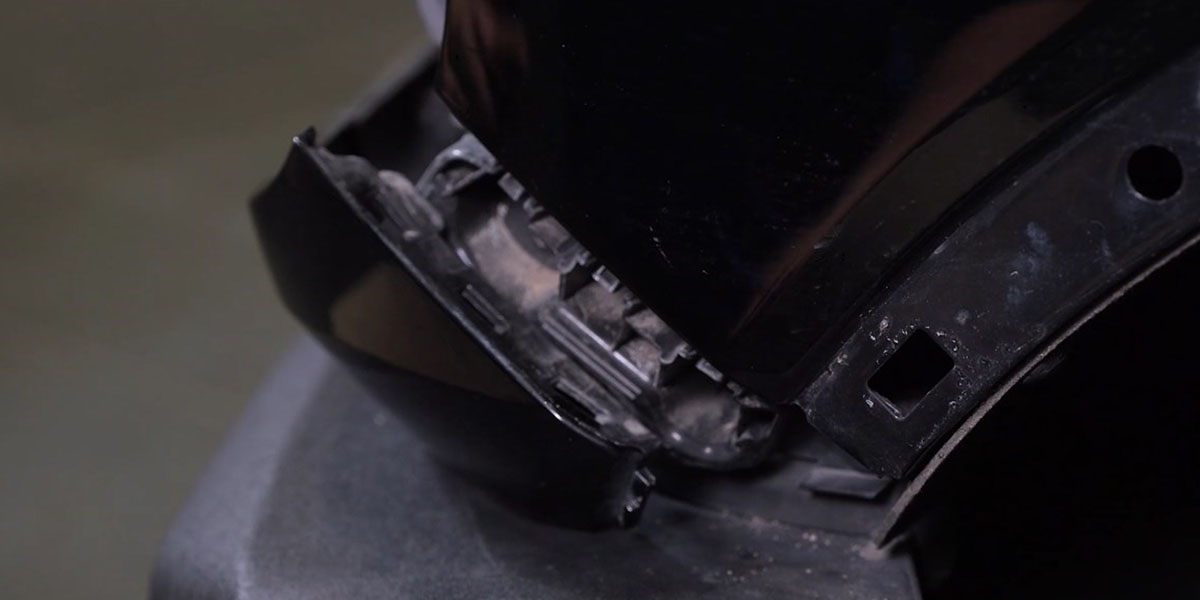
Starting where the lower grille surround meets the fenders, carefully pull the lower grille away by working from each end towards the middle to release the clips. Once the clips are released, pull the lower grille surround away from the vehicle.
Step 7 - Remove Headlight Clip and 10mm Bolts
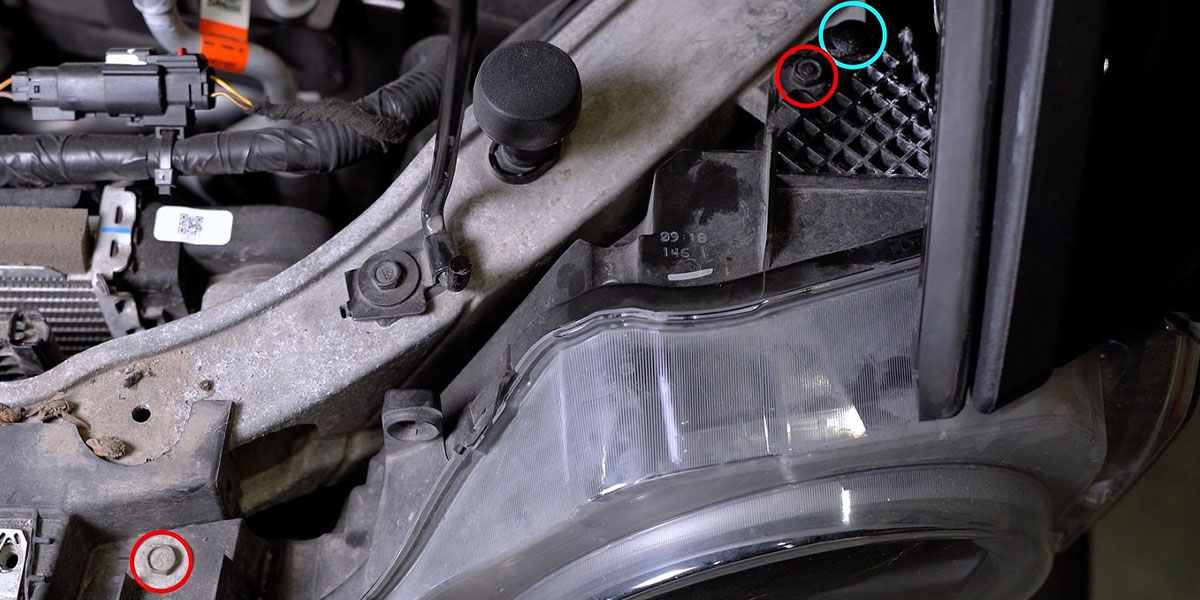
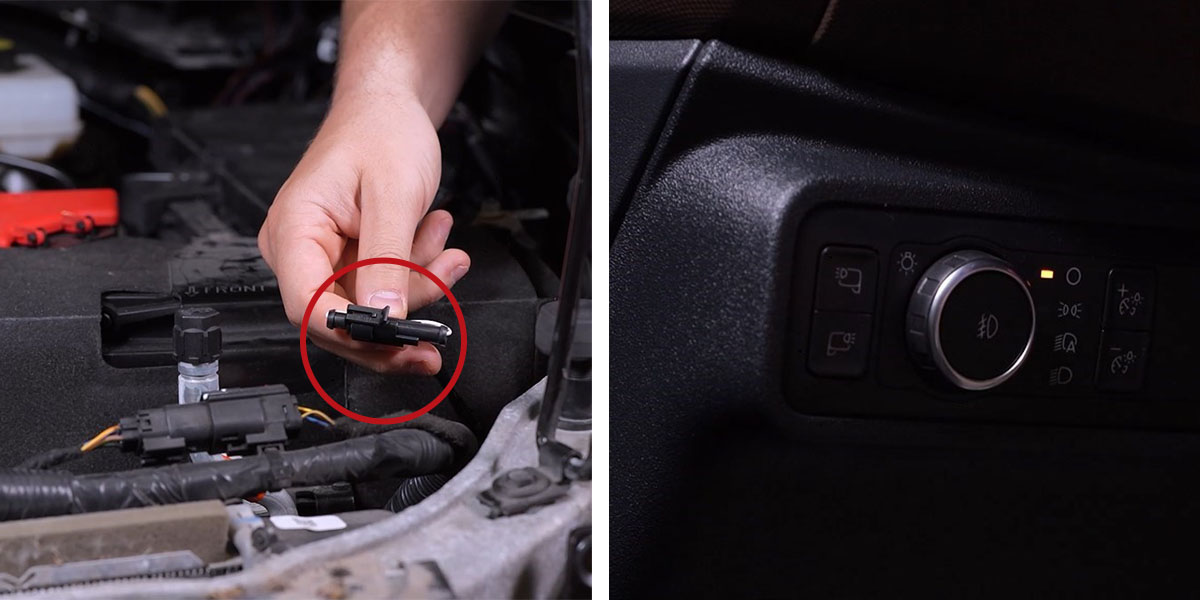
Beginning on the driver's side of the vehicle, use a plastic trim removal tool to remove the tree clip (circled in blue) from the top of the headlight. Then use a 10mm socket to remove the two 10mm bolts (circled in red) from the top of the factory headlight.
Step 8 - Remove 8mm Bolts
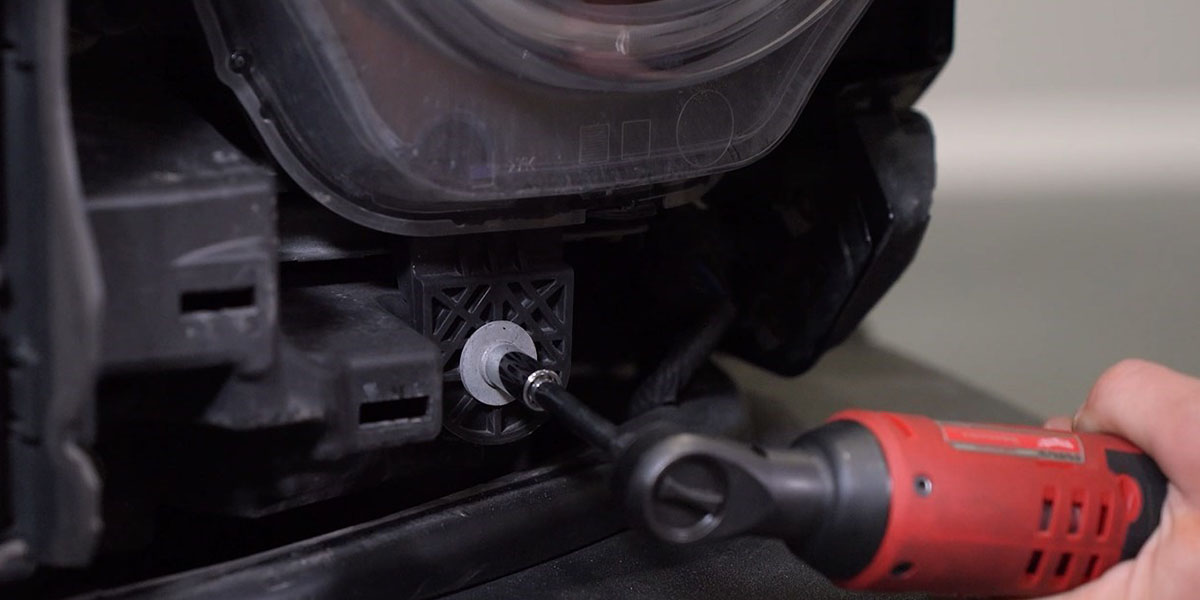
Use an 8mm socket to remove the 8mm bolt from the bottom of the factory headlight.
Step 9 - Remove Factory Headlight
Firmly pull the headlamp away from the vehicle until the ball clip holding it in place releases. Then unplug the factory wiring harness connector.
Repeat Steps 7-9 to remove the passenger side factory headlight.

Step 10 - Select White or Amber DRL Color
Before installing the Form Lighting LED Headlight, you'll need to select the DRL style you'd like to run.
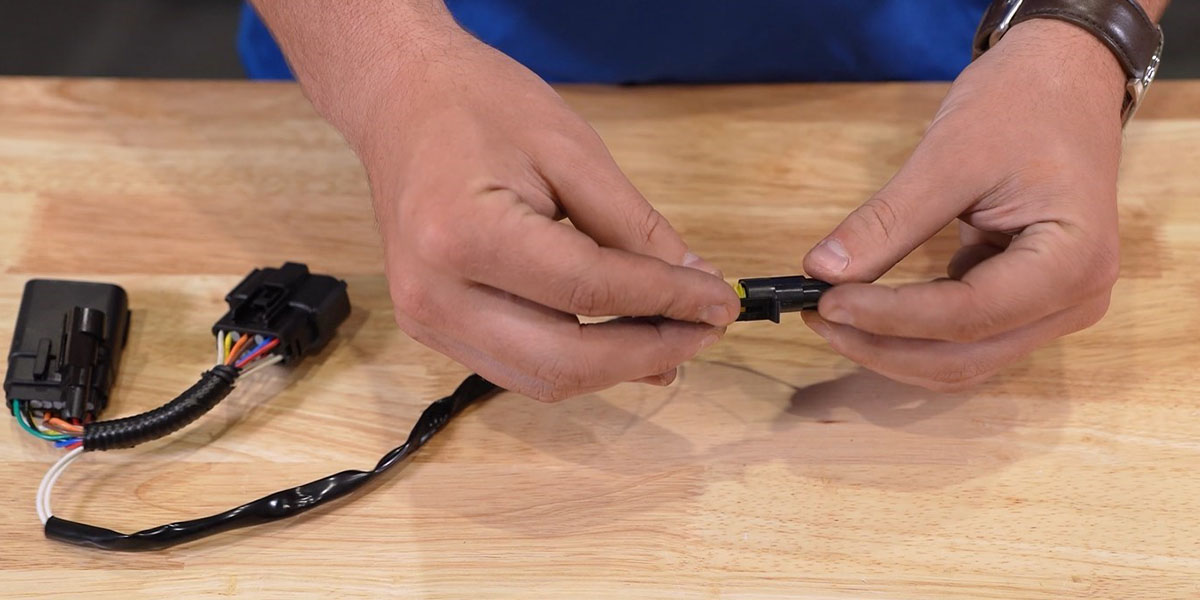
To enable the White DRL, connect the two amp connector leads labeled "white DRL" on the supplied wiring adapter.
If you would prefer an Amber DRL, simply leave the two amp connectors disconnected.
Step 11 - Install Form LED Headlight
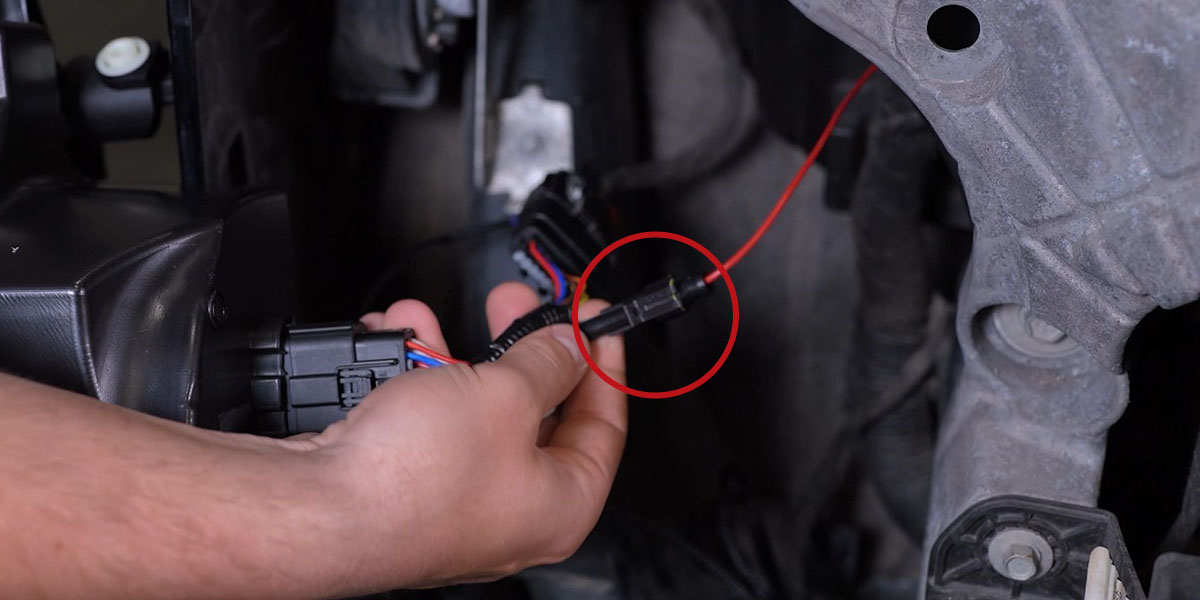
Beginning on the driver's side, plug the included adapter into the back of your new Form LED Headlight in line with the factory wiring harness.
If your vehicle did not come equipped with factory DRLs, plug the amp connector of the add-a-fuse harness into the red amp connector (circled in red) on the supplied headlight adapter, securing any loose wiring.
Then install the new LED headlight using the bolts and clips that were removed in Steps 7-8.
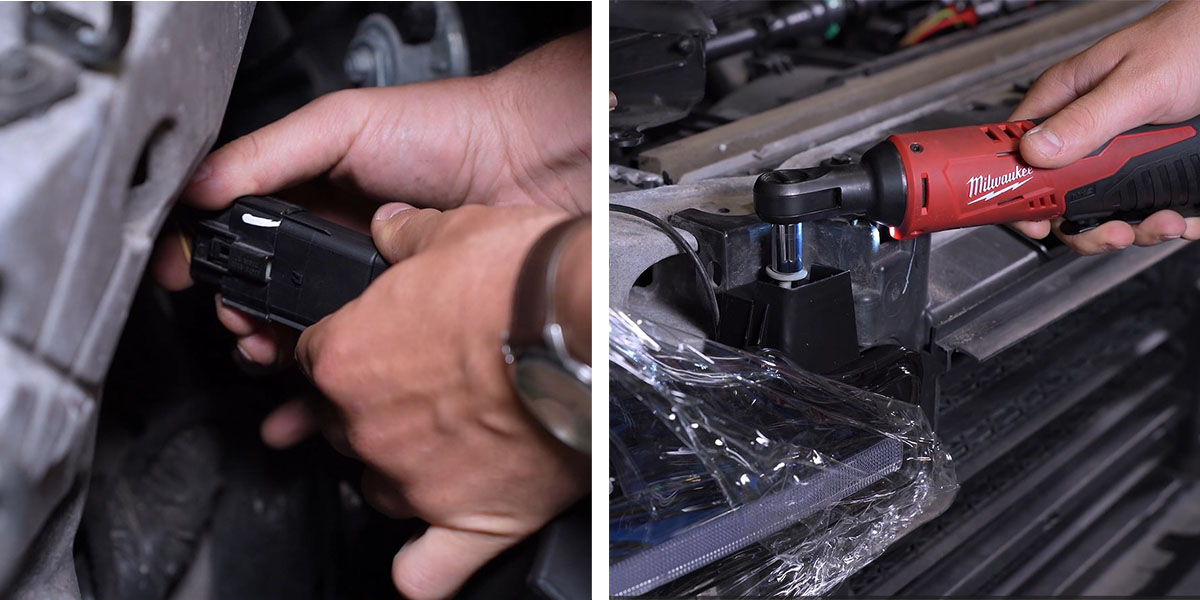
Repeat this step on the passenger side of the vehicle to install the remaining Form LED Headlight.
Step 12 - Route DRL Amp Connectors
With the Form LED Headlights bolted onto the vehicle, route the DRL amp connectors to an accessible location away from any hot or moving parts.

Step 13 - (Optional) Install DRL Fuse Tap Harness
Note: If your vehicle comes equipped with factory DRLs, skip this step.
If your vehicle did not come equipped with factory DRLs, use the following instructions to install the included add-a-fuse harness.
Open the fuse box and use a pair of needle nose pliers to remove the 10 amp fuse from slot 24.
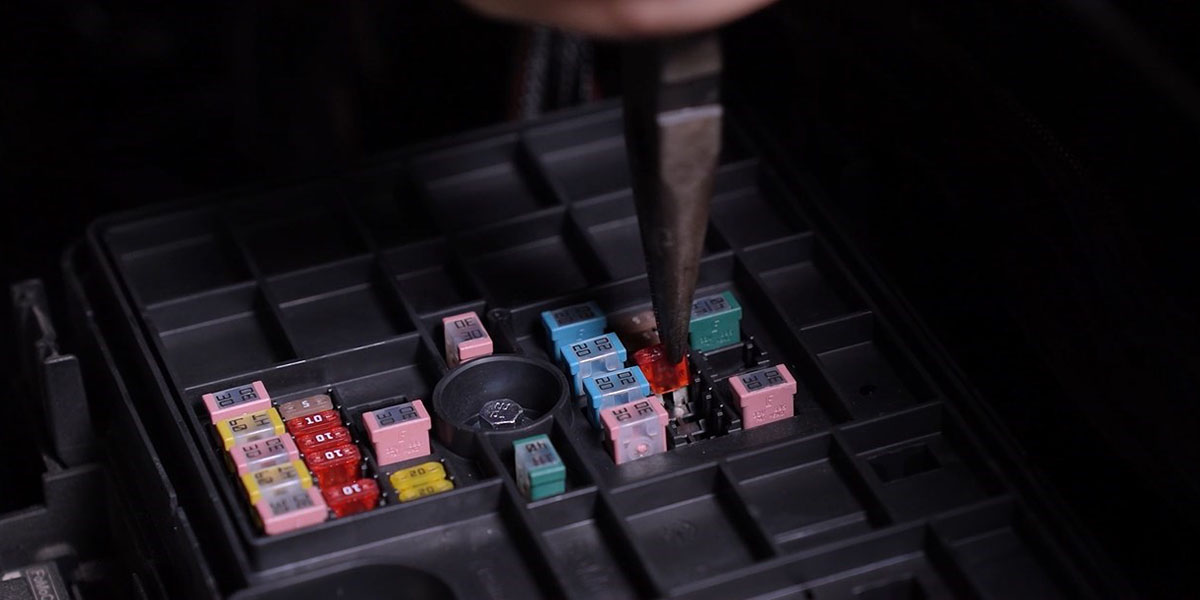
Connect the DRL Fuse Tap Harness (circled in red) in place of the previously removed 10 amp fuse as shown below.
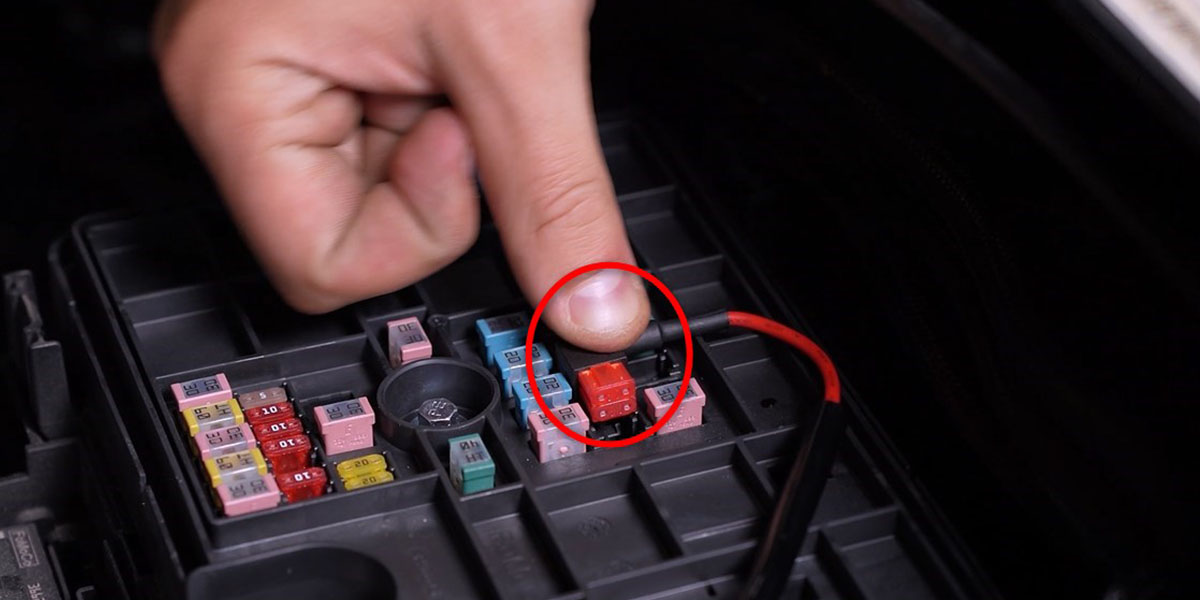
Then replace the cover on the fuse box and secure any excess wiring out of the way from any hot or moving parts.
Step 14 - Test Function
Test the headlight function thoroughly.
If you wish to change your DRL color, simply plug or unplug the DRL amp connectors routed in Step 12. Then, turn your new LED headlights off and then back on.
Step 15 - Reinstall Fenders and Grille
Reinstall the lower grille surround, fenders, and grille by reversing Steps 1-6.
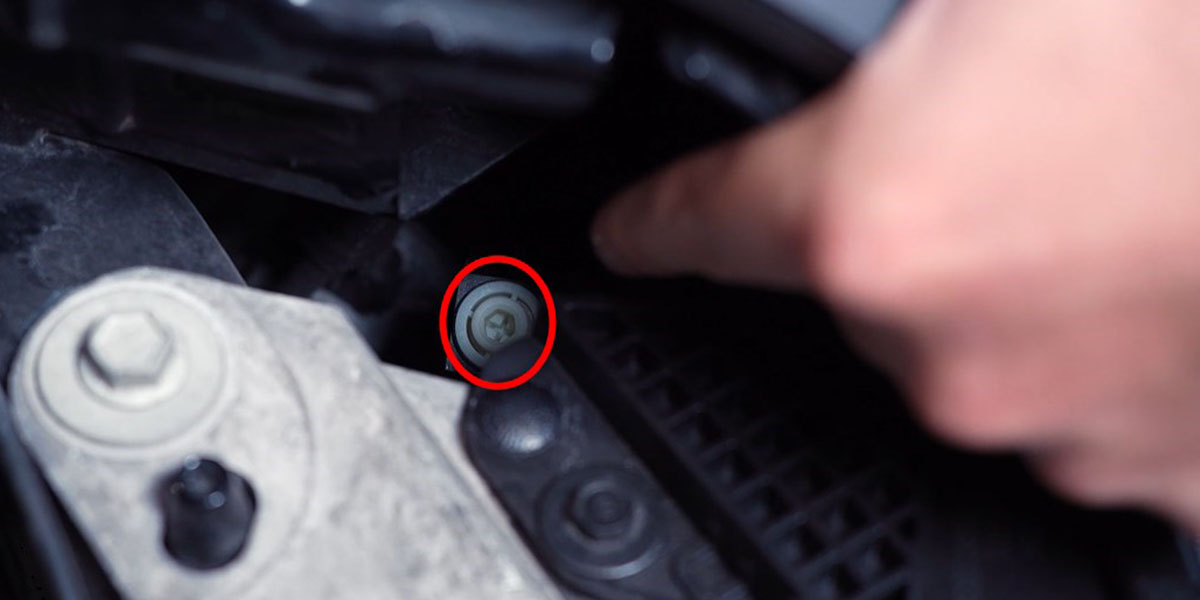
Step 16 - Aim LED Headlights
With a Phillips head screwdriver, rotate the adjustment screw (circled in red) at the top corner of the lamp left or right to adjust the light output up or down.
For a more detail description refer to our headlight aiming blog - How To: Aim Your Headlights
This completes the installation.
Questions About the Installation?
If you have any questions or issues installing Form Lighting's LED Headlights for the 2021-2024 Ford Bronco or Bronco Raptor, please contact us for further assistance.
Where Can I Buy Form Lighting Selectable Amber DRL LED Headlights for the 2021-2024 Ford Bronco and Bronco Raptor?
If you’re ready to upgrade your 2021-2024 Ford Bronco or Bronco Raptor with Form Lighting Selectable Amber DRL LED Headlights, you can purchase them by clicking here or using our dealer locator to find a dealer near you.
Want to know more about Form Lighting products? Visit formlights.com and subscribe to our newsletter for new product releases and more!
This Installation Guide is for the following SKU: FL0020.

